Since these days I show all my artwork via Facebook, I must admit I have totally neglected my blog. So sorry, I will probably get no comments at all since nobody is watching anymore.....
Anyhow, made this spread and hated it! Not my colours, and I found it looked rather messy. Well, that is me, Messy Frea LOL!!
So I decided to take out my Jane Davenport book, and practice drawing a face onto my ugly spread, and 'lo and behold', I actually like it now.....
The background is collaged, and I used inksprays en stencils, and then moved on to acrylic paints. I used some cut out heart masks from leftover paper.
The face was done with acrylic paint. I love the way her eyes turned out. You can see the edges of the colleged paper here and there, but I really don't mind that. I think she looks a little sad (as do all Jane's faces), but she also looks really sweet. Like a lovable person.
Then I stamped my message, which is good advice, and I should take it to heart myself....
Hope anyone is still watching, otherwise this would be a wasted effort. Have a great Wednesday you all!
Hugs Frea
Posts tonen met het label acrylic paint. Alle posts tonen
woensdag 16 maart 2016
zondag 14 juni 2015
Dina Wakly inspired
This week I am showing you a Dina Wakly inspired face. The background is also typically Dina's style.
I painted the face with acrylic paint and drew with the Stabilo All pencil, just like she does. I must admit that I drew the face with a regular pencil first and used the Stabilo afterwards, because I am having trouble with the black smudges this pencil gives when it touches fluids. Dina doesn't mind, and I must admit that on her faces it seems to fit, but it just doesn't fit my style. I do like the sketchy effect though that it gives as opposed to working with a marker.
That heart stamp in the left corner is my new Limor Webber stamp and I love it!!
Hope you like this weeks' page. Have a great week, hugs Frea
Challenges:
http://welove2create.blogspot.co.uk/2015/06/challenge-12-anything-mixed.html
http://thatcraftplaceblog.blogspot.co.uk/2015/06/new-challenge-anything-goes.html
http://www.scribbleandscrapcrafts.blogspot.co.uk/2015/06/challenge-46.html
I painted the face with acrylic paint and drew with the Stabilo All pencil, just like she does. I must admit that I drew the face with a regular pencil first and used the Stabilo afterwards, because I am having trouble with the black smudges this pencil gives when it touches fluids. Dina doesn't mind, and I must admit that on her faces it seems to fit, but it just doesn't fit my style. I do like the sketchy effect though that it gives as opposed to working with a marker.
That heart stamp in the left corner is my new Limor Webber stamp and I love it!!
Hope you like this weeks' page. Have a great week, hugs Frea
Challenges:
http://welove2create.blogspot.co.uk/2015/06/challenge-12-anything-mixed.html
http://thatcraftplaceblog.blogspot.co.uk/2015/06/new-challenge-anything-goes.html
http://www.scribbleandscrapcrafts.blogspot.co.uk/2015/06/challenge-46.html
zaterdag 6 juni 2015
Flowerfaces, inspired by a video of Shawn Petite
This spread was inspired by a video on You Tube by Shawn Petite. If you don't know her I strongly advise you to check her out, she makes wonderfull art.
So the background was made the way she did in this particular video.
This is how I started; I glued bookpages from an old book down and from an old leaflet about babycare. I wanted to keep some of the pictures showing through, but I'm afraid that plan fell apart.
I then scraped some gesso on with a palette knife and after drying did the same with some greens and blues. I drew out the stems and leaves with a pencil and stamped the flowers. They were coloured in with Inktense pencils. Along the bottom I stamped with an Indigo Blu stamp for some shrubbery.
I then made two circles, one the same size of the smaller and one of the larger circle stamp. Inside I painted mixed media faces with acrylic paint. The petals were cut out of a gelli plate print with a Magnolia flower die and glued on. Shading was done with a brown Pitt pen.
So the background was made the way she did in this particular video.
This is how I started; I glued bookpages from an old book down and from an old leaflet about babycare. I wanted to keep some of the pictures showing through, but I'm afraid that plan fell apart.
I then scraped some gesso on with a palette knife and after drying did the same with some greens and blues. I drew out the stems and leaves with a pencil and stamped the flowers. They were coloured in with Inktense pencils. Along the bottom I stamped with an Indigo Blu stamp for some shrubbery.
I then made two circles, one the same size of the smaller and one of the larger circle stamp. Inside I painted mixed media faces with acrylic paint. The petals were cut out of a gelli plate print with a Magnolia flower die and glued on. Shading was done with a brown Pitt pen.
I stamped some gesso with bubble wrap here and there, and stamped the sentiment with a typewriter stamp set. The wavy bit was done with Archival ink and a stencil.
Hope you like my spread. I thank Shawn for her inspiration! Love her videos! Have a nice day you all, hugs Frea
maandag 26 januari 2015
What if I fall?? Oh but my darling, what if you fly??
Don't you just love fairies?? I do, and I couldn't resist this gorgeous stamp by Lost Coast. I made a background with a brayer and Fresco Finish paints. Then I did some stamping and I used a stencil with some dark Fresco Finish paint.
With the border of a Dylusion stencil and sparkle medium by Imagination Crafts I made this border on both pages.
In a magazine called Flow there were these transparent stickers with some lovely quotes amongst which this one. I added it to the spread en to take away the shine from the plastic I added two layers of matte gel medium on top. Now it actually looks like I stamped it straight onto the background.
Now both the fairy and the dragonflies were stamped with embossing powder by Lindy's Stamp Gang Midnight Teal. Love that colour and it really matched the colours of the spread.
En thoroughly enjoyed making this spread. wishing you a wonderfull week, hugs Frea
Challenges:
http://avenue613.blogspot.nl/2015/01/challenge-108-anything-goes-woptional.html
http://stampedblessings.com/2015/01/amusing-challenge-anything-goes-15/
http://lilpatchofcraftyfriends.blogspot.com.au/2015/01/challenge-2.html
http://scribbleandscrapcrafts.blogspot.co.uk/2015/01/challenge-36-anything-goes-and-candy.html
http://kitandclowder.ning.com/january-challenge
With the border of a Dylusion stencil and sparkle medium by Imagination Crafts I made this border on both pages.
In a magazine called Flow there were these transparent stickers with some lovely quotes amongst which this one. I added it to the spread en to take away the shine from the plastic I added two layers of matte gel medium on top. Now it actually looks like I stamped it straight onto the background.
Now both the fairy and the dragonflies were stamped with embossing powder by Lindy's Stamp Gang Midnight Teal. Love that colour and it really matched the colours of the spread.
En thoroughly enjoyed making this spread. wishing you a wonderfull week, hugs Frea
Challenges:
http://avenue613.blogspot.nl/2015/01/challenge-108-anything-goes-woptional.html
http://stampedblessings.com/2015/01/amusing-challenge-anything-goes-15/
http://lilpatchofcraftyfriends.blogspot.com.au/2015/01/challenge-2.html
http://scribbleandscrapcrafts.blogspot.co.uk/2015/01/challenge-36-anything-goes-and-candy.html
http://kitandclowder.ning.com/january-challenge
zaterdag 27 december 2014
Loslaten, or translated; Letting go......
Hello girls, it's been a while, but then again, this is such a busy month. I hope you all enjoyed the holidays! Today I have a spread for you with my brandnew Paper Artsy Jofy stamps that Santa brought. The word is Dutch for 'Letting go'. It is something I have been working on this past year, and even though I sometimes still falter, I am getting the hang of it. The background was gessoed first and then I applied some light pink chalk paint here and there. Then I sprayed some Glimmer Mist Silver and let is drip down. At the bottom of the spread I scraped some Paper Artsy Crackle medium on and after drying added mauve chalk paint which gave a lovely fine crackle here and there.
In my stamp set was this stamp strip with a fine checkered border; by stamping it slightly away from the bottom of the spread and adding poles with a black pen, I made it into a fence. In the background I stamped a very fine script stamp. I coloured the 'flowers' with transparant acrylic paints. The words were embossed with Sterrenstaub embossing power Chameleon. I added fine lines with a black felt tip pen and some shading with an Inktense pencil, which I also did around the flowers. Around the border of the spread I added a grey shadow with a glato. Hope you like my spread. I will add some detail pictures.
Hugs, Frea
Challenges:
http://creativeknockouts.blogspot.nl/2014/12/69-anything-goes-lacy-sunshine.html
http://sweetstampinchallengeblog.blogspot.nl/2014/12/anything-goes.html
http://cutecardthursday.blogspot.nl/2014/12/challenge-353-anything-goes.html
http://trimmiescraftchallenge.blogspot.nl/2014/12/last-challenge-of-2014-challenge-291.html?showComment=1419715973529#c6760075421360933056
http://blog.docerelashop.com/2014/12/design-team-post-challenge-75-anything.html
http://divasbydesignchallenge.blogspot.nl/2014/12/dec-17th-team-b-anything-goes.html
http://thepapershelter.blogspot.nl/2014/12/christmas-challenge-anything-goes.html
http://pennyschallenges.blogspot.nl/2014/12/welcome-to-pennys-challenge-208.html
http://scrappers-delights-challenge-blog.blogspot.co.uk/2014/12/challenge-37-last-challenge-of-year.html
http://artbymiranchallenge.blogspot.ca/2014/12/challenge-22.html
In my stamp set was this stamp strip with a fine checkered border; by stamping it slightly away from the bottom of the spread and adding poles with a black pen, I made it into a fence. In the background I stamped a very fine script stamp. I coloured the 'flowers' with transparant acrylic paints. The words were embossed with Sterrenstaub embossing power Chameleon. I added fine lines with a black felt tip pen and some shading with an Inktense pencil, which I also did around the flowers. Around the border of the spread I added a grey shadow with a glato. Hope you like my spread. I will add some detail pictures.
Hugs, Frea
Challenges:
http://creativeknockouts.blogspot.nl/2014/12/69-anything-goes-lacy-sunshine.html
http://sweetstampinchallengeblog.blogspot.nl/2014/12/anything-goes.html
http://cutecardthursday.blogspot.nl/2014/12/challenge-353-anything-goes.html
http://trimmiescraftchallenge.blogspot.nl/2014/12/last-challenge-of-2014-challenge-291.html?showComment=1419715973529#c6760075421360933056
http://blog.docerelashop.com/2014/12/design-team-post-challenge-75-anything.html
http://divasbydesignchallenge.blogspot.nl/2014/12/dec-17th-team-b-anything-goes.html
http://thepapershelter.blogspot.nl/2014/12/christmas-challenge-anything-goes.html
http://pennyschallenges.blogspot.nl/2014/12/welcome-to-pennys-challenge-208.html
http://scrappers-delights-challenge-blog.blogspot.co.uk/2014/12/challenge-37-last-challenge-of-year.html
http://artbymiranchallenge.blogspot.ca/2014/12/challenge-22.html
donderdag 13 november 2014
Stampotique challenge 'spotlight'.
For the Stampotique challenge 'Spotlight' I made this spread in my selfmade journal. I started out by using some washi tape. I used some modeling paste and a stencil in the middle and in the corners a doily stencil and Deco Art Graphite Paste in order to make some texture. I then covered it all with Fresco Finish paint. After nearly drying I took a baby wipe and wipes the paint back, revealing parts of the stenciling.
I took a scrap piece of paper, painted it mauve with Fresco Finish and then used their crackle glaze and a pink colour on top. I cut out the circle and the tag. I stamped the Stampotique girl on the background and coloured in that part within the circle with Copic markers, and then glued the circle down. I added some Glossy Accents on the heart of her shirt. Around the circle I made some shading with Inktense pencils. I used the same pencils to make the ground she's standing on.
With some Lindy's Stamp Gang I coloured a piece of cambric. I used the leftover on my mat on the leftover piece of paper from the tag and circle. I then layered the pieces and stitched them together on my sewing machine after which I wrote down the sentiment on the tag. All the shading was made with the Inktense pencils and to was the edging around the pages. I used some gel medium to apply some glass glitter on top of the tag. As a final touch I made some splatters with the LSG spray I used to colour the cambric.
I hope you like my spread; I thought it turned out kind of cool. So I'm entering this spread into the Stampotique Designer Challenge. Have a great day! Hugs Frea
http://stampotiquedesignerschallenge.blogspot.nl/2014/11/sdc-november-2014-challenge-links.html
I took a scrap piece of paper, painted it mauve with Fresco Finish and then used their crackle glaze and a pink colour on top. I cut out the circle and the tag. I stamped the Stampotique girl on the background and coloured in that part within the circle with Copic markers, and then glued the circle down. I added some Glossy Accents on the heart of her shirt. Around the circle I made some shading with Inktense pencils. I used the same pencils to make the ground she's standing on.
With some Lindy's Stamp Gang I coloured a piece of cambric. I used the leftover on my mat on the leftover piece of paper from the tag and circle. I then layered the pieces and stitched them together on my sewing machine after which I wrote down the sentiment on the tag. All the shading was made with the Inktense pencils and to was the edging around the pages. I used some gel medium to apply some glass glitter on top of the tag. As a final touch I made some splatters with the LSG spray I used to colour the cambric.
I hope you like my spread; I thought it turned out kind of cool. So I'm entering this spread into the Stampotique Designer Challenge. Have a great day! Hugs Frea
http://stampotiquedesignerschallenge.blogspot.nl/2014/11/sdc-november-2014-challenge-links.html
dinsdag 11 november 2014
Foamboard is 'da bomb'!
I just discovered this foamboard, and it's possibilities are near enough endless. One can build storage space with it, it cut's like butter, is light yet very strong, it embosses and cuts with the thick big dies, and you can paint it and work it with all sorts of art mediums. You may have read about the workshop I did with Andy Skinner some weeks ago in which we workes with this stuff. Now I've already shown you one of the two little projects I made (if you haven't seen it yet, do scroll down a couple of posts and you will find it), so here's the second one. Sorry about the colour of this first picture; it was made at night and the lighting was not so good. The true colour is more like the other pictures.
The background piece and heart were first painted in black gesso, and then I used the Deco Art crackle paint. Now this is a white think paint, which crackles in a manner best compared with the oldfashioned enamels used in ancient times on cooking pans and strainers. Sometimes in grey of green colours. After letting the paint airdry (don't use your heating tool on it, it will crackle, but I find the crackle much better when airdried. I first slightly sanded it to make it flatter and then used blac antiqueing cream by Deco Art. Now you just apply the stuff and let it dry. Then you use a piece of dry kitchen roll and rub it off. After that I stamped it using Ranger archival ink and a dictionary stamp. I then added some Quinacridone Gold which is transparant, to give it a slightly rusty effect. On the edges I covered some of the crackled chips a coat of Burned Umber which makes it look like the enamel has chipped off revealing the metal underneath. Love the effect, it looks so darn real.
On the top piece I started out with white gesso, and after drying I added some sand structure medium. After drying I painted the entire piece with transparant Paynes Grey, which is a blueish grey colour. Because of the transparancy the white of the gesso shimmers through here and there which is exactly what you want. After drying you make a fine splatter with a white acrylic paint. Then the piece is painted with Red Iron Oxide and Quinacridone Azo Gold paints. here and there you can mix some Paynes Grey in to make darker patches.
The heart was also painted with the Crackle paint, but in this case I used Antiquing Cream Green instead of the black I used in the background. I also added some Quinacridone Azo Gold, again to make it rusty looking.
This element was cut and embossed with a Tim Holtz die, also from this foamboard. That make it considerably thinner. This element was given layer upon layer, and the endresult is an effect as if this piece is zink metal which was rusted. It is this piece that I am most happy with. I think the result is very convincing.
So, I'd advise you to check out the new Deco Art line, brilliant stuff and very affordable as well.
Hugs Frea
Challenges:
http://www.simonsaysstampblog.com/mondaychallenge/?p=2141
http://notjustcardschallenges.blogspot.co.uk/2014/11/challenge-6.html
http://lovetocreatechallenge.blogspot.nl/2014/11/challenge-141-anything-goes.html
http://www.sparklingblackrose-craftmylife.blogspot.co.uk/2014/10/all-crafts-challenge-octobernovember.html
http://www.ttcrd.blogspot.nl/2014/11/ttcrd-challenge-nov11-nov17.html
http://partytimetuesdays.blogspot.ca/2014/11/ptt-challenge-189-anything-goes-theme.html
http://www.craftysentiments.blogspot.nl/2014/11/anything-goes-challenge.html
http://thepapergirlschallenge.blogspot.nl/2014/11/challenge-67-mixed-media.html
http://thepapernestdollschallenge.blogspot.nl/2014/11/ch-23-anything-goes.html
http://www.flonzcraft.com/vsc/?p=1918
http://anythingbutacard.blogspot.ca/2014/11/whatever-strikes-your-cre8time-fancy.html
http://thatcraftplaceblog.blogspot.nl/2014/11/new-challenge-anything-goes.html
The background piece and heart were first painted in black gesso, and then I used the Deco Art crackle paint. Now this is a white think paint, which crackles in a manner best compared with the oldfashioned enamels used in ancient times on cooking pans and strainers. Sometimes in grey of green colours. After letting the paint airdry (don't use your heating tool on it, it will crackle, but I find the crackle much better when airdried. I first slightly sanded it to make it flatter and then used blac antiqueing cream by Deco Art. Now you just apply the stuff and let it dry. Then you use a piece of dry kitchen roll and rub it off. After that I stamped it using Ranger archival ink and a dictionary stamp. I then added some Quinacridone Gold which is transparant, to give it a slightly rusty effect. On the edges I covered some of the crackled chips a coat of Burned Umber which makes it look like the enamel has chipped off revealing the metal underneath. Love the effect, it looks so darn real.
On the top piece I started out with white gesso, and after drying I added some sand structure medium. After drying I painted the entire piece with transparant Paynes Grey, which is a blueish grey colour. Because of the transparancy the white of the gesso shimmers through here and there which is exactly what you want. After drying you make a fine splatter with a white acrylic paint. Then the piece is painted with Red Iron Oxide and Quinacridone Azo Gold paints. here and there you can mix some Paynes Grey in to make darker patches.
The heart was also painted with the Crackle paint, but in this case I used Antiquing Cream Green instead of the black I used in the background. I also added some Quinacridone Azo Gold, again to make it rusty looking.
This element was cut and embossed with a Tim Holtz die, also from this foamboard. That make it considerably thinner. This element was given layer upon layer, and the endresult is an effect as if this piece is zink metal which was rusted. It is this piece that I am most happy with. I think the result is very convincing.
So, I'd advise you to check out the new Deco Art line, brilliant stuff and very affordable as well.
Hugs Frea
Challenges:
http://www.simonsaysstampblog.com/mondaychallenge/?p=2141
http://notjustcardschallenges.blogspot.co.uk/2014/11/challenge-6.html
http://lovetocreatechallenge.blogspot.nl/2014/11/challenge-141-anything-goes.html
http://www.sparklingblackrose-craftmylife.blogspot.co.uk/2014/10/all-crafts-challenge-octobernovember.html
http://www.ttcrd.blogspot.nl/2014/11/ttcrd-challenge-nov11-nov17.html
http://partytimetuesdays.blogspot.ca/2014/11/ptt-challenge-189-anything-goes-theme.html
http://www.craftysentiments.blogspot.nl/2014/11/anything-goes-challenge.html
http://thepapergirlschallenge.blogspot.nl/2014/11/challenge-67-mixed-media.html
http://thepapernestdollschallenge.blogspot.nl/2014/11/ch-23-anything-goes.html
http://www.flonzcraft.com/vsc/?p=1918
http://anythingbutacard.blogspot.ca/2014/11/whatever-strikes-your-cre8time-fancy.html
http://thatcraftplaceblog.blogspot.nl/2014/11/new-challenge-anything-goes.html
maandag 3 november 2014
I love the Jofy style!!
Hi girls, don't you just love those Jofy stamps? The're so simple really, but love the effect of them. Now I bought myself some matching Fresco Finish paints and the Fresco Finish crackle medium; just love the effect of this medium. The crackle is so fine, just great! So I painted the background with a taupe colour and after adding crackle medium ust here and there, I topped it with a light pink colour. I coloured the flowers in with some transluscent Fresco Finish paints.
After doing the background I stamped some scriptstamp on, first with a white paint and then in black ink.
Since the paints I used for the flowers are transluscent you can paint straight over them without loosing the lines. Love the effect!
So pretty don't you think?!
So, heading for bed now, tomorrow's another day working. Hugs Frea
Chlalenges:
http://www.sparklingblackrose-craftmylife.blogspot.co.uk/2014/10/all-crafts-challenge-octobernovember.html
http://craftcreatoins.blogspot.nl/p/new-challenge.html
http://notjustcardschallenges.blogspot.co.uk/2014/10/challenge-5.html
http://thepapergirlschallenge.blogspot.nl/2014/11/challenge-67-mixed-media.html
http://www.throughthepurplehazechallenges.blogspot.nl/2014/11/66-tattered-lace-anything-goes.html
http://anythingbutacard.blogspot.ca/2014/11/starting-november-with-cre8time-fun-for.html
http://eclecticellapu.blogspot.co.uk/2014/11/wowswers.html
http://pennyblackatallsorts.blogspot.nl/2014/11/november-challenge-anything-goes.html
http://www.scribbleandscrapcrafts.blogspot.co.uk/2014/10/challenge-30-and-new-5-day-deal.html
http://sentimentalsundays.blogspot.nl/2014/11/challenge-231-anything-goes.html
After doing the background I stamped some scriptstamp on, first with a white paint and then in black ink.
Since the paints I used for the flowers are transluscent you can paint straight over them without loosing the lines. Love the effect!
So pretty don't you think?!
So, heading for bed now, tomorrow's another day working. Hugs Frea
Chlalenges:
http://www.sparklingblackrose-craftmylife.blogspot.co.uk/2014/10/all-crafts-challenge-octobernovember.html
http://craftcreatoins.blogspot.nl/p/new-challenge.html
http://notjustcardschallenges.blogspot.co.uk/2014/10/challenge-5.html
http://thepapergirlschallenge.blogspot.nl/2014/11/challenge-67-mixed-media.html
http://www.throughthepurplehazechallenges.blogspot.nl/2014/11/66-tattered-lace-anything-goes.html
http://anythingbutacard.blogspot.ca/2014/11/starting-november-with-cre8time-fun-for.html
http://eclecticellapu.blogspot.co.uk/2014/11/wowswers.html
http://pennyblackatallsorts.blogspot.nl/2014/11/november-challenge-anything-goes.html
http://www.scribbleandscrapcrafts.blogspot.co.uk/2014/10/challenge-30-and-new-5-day-deal.html
http://sentimentalsundays.blogspot.nl/2014/11/challenge-231-anything-goes.html
zondag 2 november 2014
Weekend has come and gone. On the upside, I got some crafting done!!
And here it is, my spread.
I started out with Fresco Finish paints for the background and used mat medium to glue down some material in the corners. I emphasized the structure by rubbing Inca Gold Hematite onto the fabric. Then I used Golden Molding Poaste through a stencil and after drying coloured it with Pan Pastel Turqoise. I also added shading with a grey Pan Pastel.
I stamped a little fairy and coloured her wings with Daler Rowney Pearlescent ink and the bubble on which she's sitting with Glimmer Mist Pearl.
In the same stamp set were these scrolls which I stamped with Indigo Blue Flitter glue and added gilding flakes. The 'Fairy dust' was stamped and embossed with gold embossing powder. And then I did some distresssing with Black Soot Distressing ink.
I do hope you like my spread; I thouroughly enjoyed making it. Have a great week!! Hugs Frea
Challenges:
http://wowembossingpowder.blogspot.co.uk/2014/11/november-2014-monthly-challenge-and.html
http://challengeupyourlife.blogspot.nl/2014/11/challenge-1-anything-goes.html#.VFarJVfVSb4
http://alteredeclectics.blogspot.co.uk/2014/11/oh-my-word.html
http://imagination-craftschallenges.blogspot.co.uk/2014/11/imagination-crafts-november-challenge.html
http://memascrafts.blogspot.nl/2013/11/november-challenge.html
http://rheddscreativespirit.blogspot.co.uk/2014/11/november-challenge.html
http://thecraftingcafe.blogspot.co.uk/2014/11/november-challenge-not-card.html
dinsdag 28 oktober 2014
Andy Skinner workshop.
Hi everyone, I had a great weekend at the Craftorij retreat. We did two workshops, one by Andy Skinner from Deco Art and one by France Papillon. Now here's what I made with Andy; love love love the Deco Art line; the fluid acrylics are brilliant and I just love all their mediums. We had a go at trying out a lot of stuff, and I really like the effects you can achieve.
Now this project was made with presentation board; it's a hard foam covered on both sides with black paper. It weighs next to nothing, you can cut is easily with a craft knife, you can diecut and emboss it.
So the wings have been diecut from this material. I made some faux rust on it by firstly putting down a layer of white gesso,after which you ass Sand Texture medium just here and there, not to much. Then you paint it with Paynes Grey acrylic, splatter it with a white acrylic mist, and then paint with some Quinacridone Gold and for the darker spots mix some paynes grey in. The ribbets (which are actually sticky pearls) were done in the same manner.
Now the background was a printed paper which I glued on after which I used several colours of paint in a drybrushing kind of way.
I sanded the edges and added some rubons which I protected by covering them with mat gel medium.
The top layer was first covered in black gesso. I then added a layer of crackle paint which is white but can be tinted as well. You best let this airdry which does take a while. After drying I slightly sanded it in order to flatten it out enough to stamp on it. I then coverend the entire plaque with black antiqueing cream and let that dry before rubbing it off with a baby wipe. After drying it again I stamped the bicycle on. As a final touch I used a Burnt Umber to make faux chipped pieces on the edges of the plaque.
I added some Quinacridone Gold to make some faux rusty drips to make the piece look like a rusted metal enamel plate. Love the effect! As a final touch I added some rusted wire and burlap. I really like this piece. I made another but will make a separate post for that one. Have a great week, hugs Frea
Challenges:
http://partytimetuesdays.blogspot.ca/2014/10/ptt-challenge-187-anything-goes-theme.html
http://www.ttcrd.blogspot.nl/2014/10/ttcrd-anything-goes-oct-27th-nov3rd.html
http://craftcreatoins.blogspot.nl/p/new-challenge.html
http://www.sparklingblackrose-craftmylife.blogspot.co.uk/
http://artisticinspirationschallenges.blogspot.co.uk/2014/10/challenge-115-anything-goes-spooky.html
http://notjustcardschallenges.blogspot.co.uk/2014/10/challenge-5.html
http://stampedblessings.com/2014/10/amusing-challenge-anything-goes-12/
http://sweetstampinchallengeblog.blogspot.nl/2014/10/anything-but-card.html
http://treasuredtimesrubberstampschallenges.blogspot.nl/2014/10/challenge-27.html
Now this project was made with presentation board; it's a hard foam covered on both sides with black paper. It weighs next to nothing, you can cut is easily with a craft knife, you can diecut and emboss it.
So the wings have been diecut from this material. I made some faux rust on it by firstly putting down a layer of white gesso,after which you ass Sand Texture medium just here and there, not to much. Then you paint it with Paynes Grey acrylic, splatter it with a white acrylic mist, and then paint with some Quinacridone Gold and for the darker spots mix some paynes grey in. The ribbets (which are actually sticky pearls) were done in the same manner.
Now the background was a printed paper which I glued on after which I used several colours of paint in a drybrushing kind of way.
I sanded the edges and added some rubons which I protected by covering them with mat gel medium.
The top layer was first covered in black gesso. I then added a layer of crackle paint which is white but can be tinted as well. You best let this airdry which does take a while. After drying I slightly sanded it in order to flatten it out enough to stamp on it. I then coverend the entire plaque with black antiqueing cream and let that dry before rubbing it off with a baby wipe. After drying it again I stamped the bicycle on. As a final touch I used a Burnt Umber to make faux chipped pieces on the edges of the plaque.
I added some Quinacridone Gold to make some faux rusty drips to make the piece look like a rusted metal enamel plate. Love the effect! As a final touch I added some rusted wire and burlap. I really like this piece. I made another but will make a separate post for that one. Have a great week, hugs Frea
Challenges:
http://partytimetuesdays.blogspot.ca/2014/10/ptt-challenge-187-anything-goes-theme.html
http://www.ttcrd.blogspot.nl/2014/10/ttcrd-anything-goes-oct-27th-nov3rd.html
http://craftcreatoins.blogspot.nl/p/new-challenge.html
http://www.sparklingblackrose-craftmylife.blogspot.co.uk/
http://artisticinspirationschallenges.blogspot.co.uk/2014/10/challenge-115-anything-goes-spooky.html
http://notjustcardschallenges.blogspot.co.uk/2014/10/challenge-5.html
http://stampedblessings.com/2014/10/amusing-challenge-anything-goes-12/
http://sweetstampinchallengeblog.blogspot.nl/2014/10/anything-but-card.html
http://treasuredtimesrubberstampschallenges.blogspot.nl/2014/10/challenge-27.html
zondag 19 oktober 2014
Journey, Time, Fly; Life Moments...
This spread I made in my selfmade Donna Downey journal. I started by covering the pages with transparant geso since I knew I would be using inks en sprays. I added some modeling paste through a stencil to create texture and with acrylic ink and another I added some more interest to the background. Then I glued down some frayed peaces of stamped linen. These tags I used are by Ephemera's garden; all you have to do is print them
out in the size you want them. All the tags used on this spread are
from one set.If you look at that blue green tag you will see a mystical kind of creature; I really like this design!
Here you can see the other side of the spread with the inclusion flipped over.
I sprayed the background with Lindy's Stamp Gang sprays Steampunk Sepia and Turbine Teal. Love the shimmer and the way these inks dry. After drying a made some splatters with Steeampunk Sepia to give it some more texture.
I glued them down on cardstock to give them some solidity since printer paper is quite thin. I then distressed the edges with a paper distresser and added D.I. Walnut Stain.
Here is a detailpicture which shows the shimmer of the paints and the texture of the modeling paste.
Here you can see what the effect is of the drops of the spray after letting the first layer dry.
The textstamps are by Stampers Anonymous, and the Memories stamp is a really old stamp I've had for ages by Inkadinkado. Hope you enjoyed my spread. Have a great Sunday! Hugs Frea
Challenges:
http://treasuredtimesrubberstampschallenges.blogspot.nl/2014/10/challenge-27.html
http://aagwat.blogspot.co.uk/2014/10/challenge-03.html
http://alteredeclectics.blogspot.co.uk/2014/10/another-month-another-challenge.html
http://craftingattheweekend.blogspot.co.uk/2014/09/challenge-6-and-new-design-team.html
http://disdigidesignschallenge.blogspot.nl/2014/10/mystical-creatures-challenge.html
http://countryviewchallenges.blogspot.co.uk/2014/10/welcome-to-octobers-challenge.html
http://pictureandscrap.blogspot.nl/2014/10/udfordring-84-brug-blomster.html
http://thesistersofcraft.blogspot.co.uk/2014/10/sisters-of-craft-october-anything-goes.html
Here you can see the other side of the spread with the inclusion flipped over.
I sprayed the background with Lindy's Stamp Gang sprays Steampunk Sepia and Turbine Teal. Love the shimmer and the way these inks dry. After drying a made some splatters with Steeampunk Sepia to give it some more texture.
I glued them down on cardstock to give them some solidity since printer paper is quite thin. I then distressed the edges with a paper distresser and added D.I. Walnut Stain.
The textstamps are by Stampers Anonymous, and the Memories stamp is a really old stamp I've had for ages by Inkadinkado. Hope you enjoyed my spread. Have a great Sunday! Hugs Frea
Challenges:
http://treasuredtimesrubberstampschallenges.blogspot.nl/2014/10/challenge-27.html
http://aagwat.blogspot.co.uk/2014/10/challenge-03.html
http://alteredeclectics.blogspot.co.uk/2014/10/another-month-another-challenge.html
http://craftingattheweekend.blogspot.co.uk/2014/09/challenge-6-and-new-design-team.html
http://disdigidesignschallenge.blogspot.nl/2014/10/mystical-creatures-challenge.html
http://countryviewchallenges.blogspot.co.uk/2014/10/welcome-to-octobers-challenge.html
http://pictureandscrap.blogspot.nl/2014/10/udfordring-84-brug-blomster.html
http://thesistersofcraft.blogspot.co.uk/2014/10/sisters-of-craft-october-anything-goes.html
zondag 5 oktober 2014
When was the last time you counted your blessings?
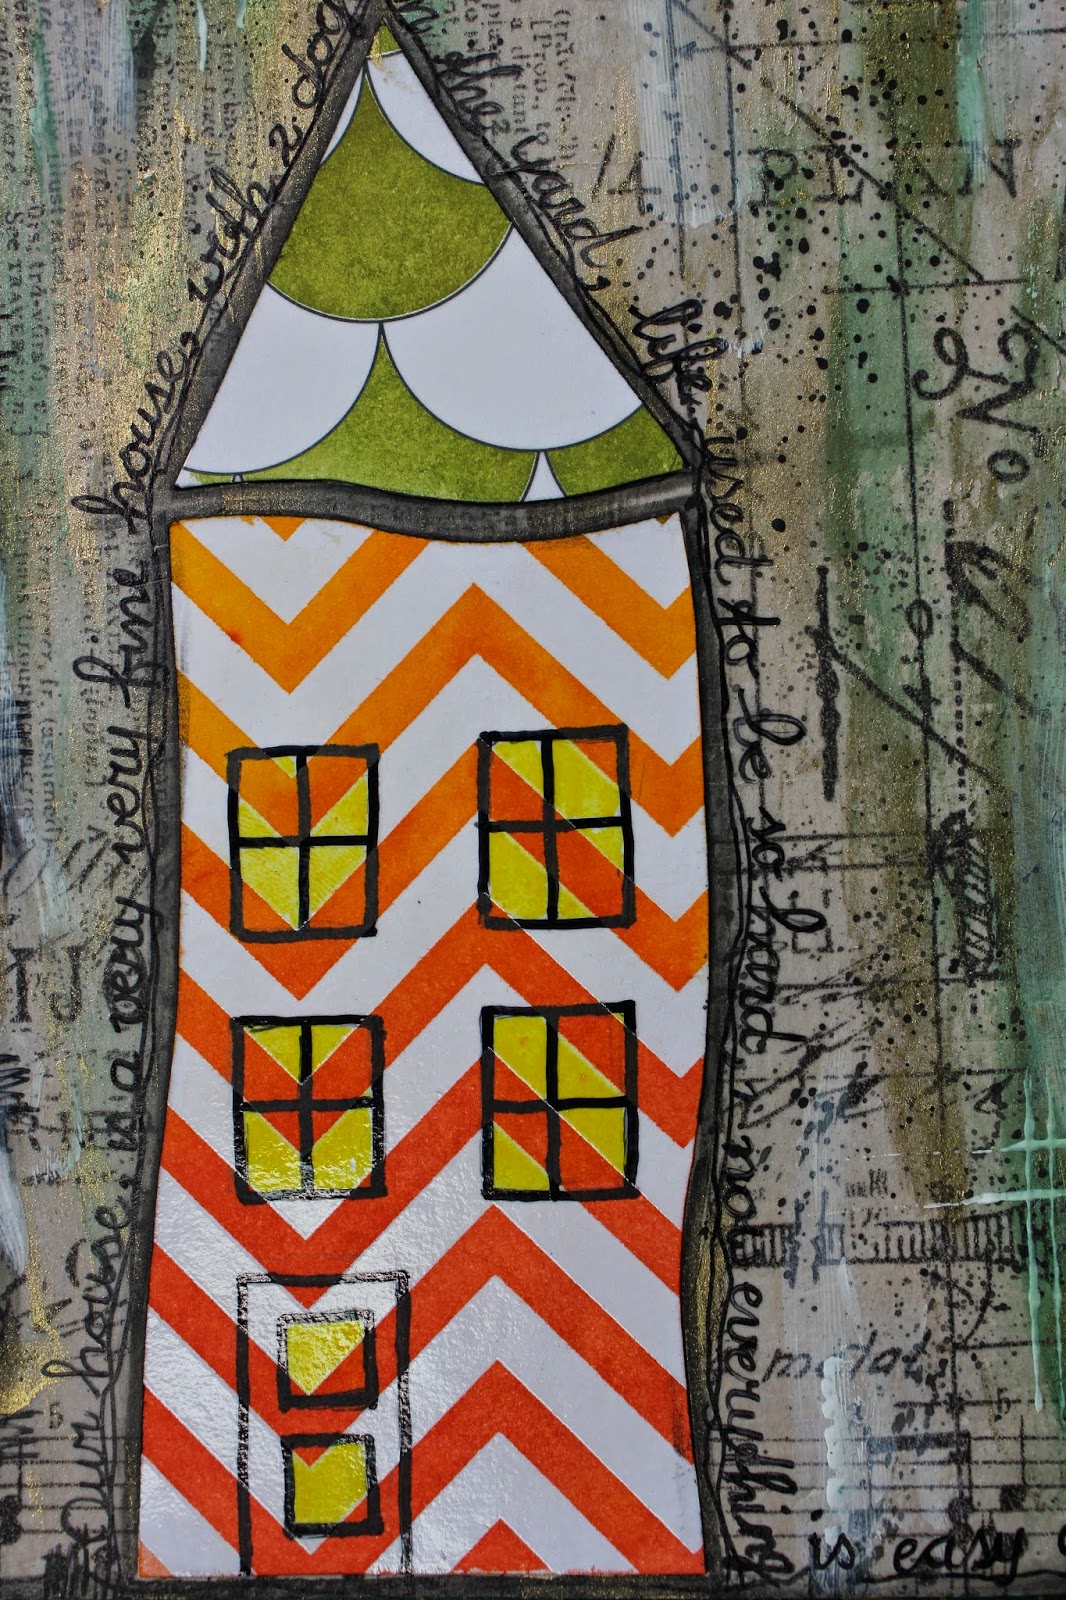
I'm on a roll here! Trying to finish te last pages in my Round Robin journal so I can pimp the cover! That would be my 2nd journal ever to get finished. The page was inspired by France Papillon, a great mixed media artist. I used the lyrics of the Crosby, Stilss, Nash & Young song 'Our House'. Slightly altered the text though, since we don't have cats but two dogs it goes: 'with two dogs in the yard....'!
The houses were made with Prima resist papers, coloured with Distress Stains and Dylusions. Those work just great together! I drew the doors and windows on with a permanent marker and made the windows yellow with a Pitt Pen.
On my T.H. tissuepaper background I smeared some golden en metallic green paints as well as some white gesso.
Hope you like it, have a great Sunday, hugs Frea
Challenges:
http://acreativeneed.wordpress.com/2014/10/04/yellow-and-orange-challenge-inspiration/
http://artbymiranchallenge.blogspot.ca/2014/10/challenge-16-anything-goes.html
http://creativecornerchallenges.blogspot.de/
http://qkrstampede.blogspot.co.uk/2014/10/qkr-stampede-challenge-107-anything-goes.html
http://catchthebugblog.blogspot.nl/2014/10/october-anything-goes-challenge.html http://www.charismacardz.blogspot.nl/2014/09/anything-but-card.html
http://dianamlarson.blogspot.nl/2014/10/dlart-october-linky-challenge.html
http://sassystudiodesigns.blogspot.nl/2014/10/dtbst-249-anything-goes.html
http://avenue613.blogspot.nl/2014/10/challenge-92-anything-goes.html
http://anythingbutacard.blogspot.ca/2014/10/celebrating-seasons-of-change-for-week.html
http://onestitchatatimechallenge.blogspot.nl/2014/10/challenge-221.html
The houses were made with Prima resist papers, coloured with Distress Stains and Dylusions. Those work just great together! I drew the doors and windows on with a permanent marker and made the windows yellow with a Pitt Pen.
On my T.H. tissuepaper background I smeared some golden en metallic green paints as well as some white gesso.
Hope you like it, have a great Sunday, hugs Frea
Challenges:
http://acreativeneed.wordpress.com/2014/10/04/yellow-and-orange-challenge-inspiration/
http://artbymiranchallenge.blogspot.ca/2014/10/challenge-16-anything-goes.html
http://creativecornerchallenges.blogspot.de/
http://qkrstampede.blogspot.co.uk/2014/10/qkr-stampede-challenge-107-anything-goes.html
http://catchthebugblog.blogspot.nl/2014/10/october-anything-goes-challenge.html http://www.charismacardz.blogspot.nl/2014/09/anything-but-card.html
http://dianamlarson.blogspot.nl/2014/10/dlart-october-linky-challenge.html
http://sassystudiodesigns.blogspot.nl/2014/10/dtbst-249-anything-goes.html
http://avenue613.blogspot.nl/2014/10/challenge-92-anything-goes.html
http://anythingbutacard.blogspot.ca/2014/10/celebrating-seasons-of-change-for-week.html
http://onestitchatatimechallenge.blogspot.nl/2014/10/challenge-221.html
maandag 22 september 2014
My grandmother when she was young, what a lovely picture!
I found this ancient picture of my grandmother when she was young in a box with old pictures in the attic, and knew I had to do a spread with it. I did make a copy first because I didn't want to use the original.
So this is how the spread turned out. I started with Distress Paints Antique Linen and Tarnished Brass, which turned out much more yellow than I expected. Then I took a stencil and Distress Paint Walnut Stain and Gathered Twigs and made the Fisbones. I used a Kaisercraft stamp and Stazon Orange Zest and made the random smudges on the background. I stamped the double squares with a stamp and Metallic Copper acrylic paint amd here and there I stamped a sewing pattern with a mini Prima stamp. Then I took out Viva Rusty Paper paint and made the butterflies with a TCW stencil.
While that was drying I distressed some strips of paper with an edge distresser and Distress Ink Walnut Stain. I took some plaster bandage and sprayed Dylusions Chocolate and Squeezed Orange over it and let it dry. After drying I frayed the edges, layered strips and bandage and did some stitching on my sewing machine. The same proces was repeated with the strip and cards on the right page. On each set I added a home rusted paperclip.
On some spots I used gel medium and golden microbeads, copper crushed glass and copper mica.
Here's a close up of the Rusty Paper butterflies. The other butterflies are by K & Company.
I hope you enjoyed my spread and the description on how it was made. Have a great week, hugs Frea
Challenges:
http://craftybootschallenges.blogspot.nl/2014/09/anything-goes.html
http://www.craftybloggersnetwork.blogspot.nl/2014/09/september-challenge-at-crafty-bloggers.html
http://craftingfromtheheartchallengeblog.blogspot.nl/2014/09/challenge-37.html
http://2cuteinkchallenges.blogspot.nl/2014/09/challenge-115-fall.html
http://www.sparklingblackrose-craftmylife.blogspot.co.uk/2014/08/all-crafts-challenge-augustseptember.html
http://notjustcardschallenges.blogspot.co.uk/2014/09/challenge-02-and-dt-call.html
http://craftcreatoins.blogspot.nl/p/new-challenge.html
http://melonheadzfriends.blogspot.nl/2014/09/autumn-colors-challenge.html
http://www.lunagirlmoonbeams.com/2014/09/new-creative-challenge-theme-autumn.html
http://lexiscreations.blogspot.nl/2014/09/challenge-125-and-winners-of-124.html
http://incywincydesigns.blogspot.nl/2014/09/anything-goes.html
So this is how the spread turned out. I started with Distress Paints Antique Linen and Tarnished Brass, which turned out much more yellow than I expected. Then I took a stencil and Distress Paint Walnut Stain and Gathered Twigs and made the Fisbones. I used a Kaisercraft stamp and Stazon Orange Zest and made the random smudges on the background. I stamped the double squares with a stamp and Metallic Copper acrylic paint amd here and there I stamped a sewing pattern with a mini Prima stamp. Then I took out Viva Rusty Paper paint and made the butterflies with a TCW stencil.
While that was drying I distressed some strips of paper with an edge distresser and Distress Ink Walnut Stain. I took some plaster bandage and sprayed Dylusions Chocolate and Squeezed Orange over it and let it dry. After drying I frayed the edges, layered strips and bandage and did some stitching on my sewing machine. The same proces was repeated with the strip and cards on the right page. On each set I added a home rusted paperclip.
On some spots I used gel medium and golden microbeads, copper crushed glass and copper mica.
Here's a close up of the Rusty Paper butterflies. The other butterflies are by K & Company.
I hope you enjoyed my spread and the description on how it was made. Have a great week, hugs Frea
Challenges:
http://craftybootschallenges.blogspot.nl/2014/09/anything-goes.html
http://www.craftybloggersnetwork.blogspot.nl/2014/09/september-challenge-at-crafty-bloggers.html
http://craftingfromtheheartchallengeblog.blogspot.nl/2014/09/challenge-37.html
http://2cuteinkchallenges.blogspot.nl/2014/09/challenge-115-fall.html
http://www.sparklingblackrose-craftmylife.blogspot.co.uk/2014/08/all-crafts-challenge-augustseptember.html
http://notjustcardschallenges.blogspot.co.uk/2014/09/challenge-02-and-dt-call.html
http://craftcreatoins.blogspot.nl/p/new-challenge.html
http://melonheadzfriends.blogspot.nl/2014/09/autumn-colors-challenge.html
http://www.lunagirlmoonbeams.com/2014/09/new-creative-challenge-theme-autumn.html
http://lexiscreations.blogspot.nl/2014/09/challenge-125-and-winners-of-124.html
http://incywincydesigns.blogspot.nl/2014/09/anything-goes.html
Abonneren op:
Posts (Atom)