I made this spread for the Stampotique challenge; numbers. My inspiration came from France Papillon for the background. I used Lindy's sprays and Golden modeling paste which I coloured with LSG Magicals. Then I glued tissuepaper all over the spread.
I coloured my Stampotique stamp with Copics.
The frame around my Stampotique girl as well as the feathers are wood and were first painted black, and then I added Deco Art crackle paint. After drying I used Deco Art patina on it. I painted some of the chips in raw umber as if they chipped off. Both the frame and the feathers got some shading with an inktense pencil.
I outlined part of the raised surface of the modeling paste with an inktense pencil and added sequins.
The text was typed on my old trusted typwriter.
I hope you like my spread. Almost weekend!! Hugs Frea
And of course I made this spread for the Stampotique Designer Challenge 185.
http://stampotiquedesignerschallenge.blogspot.nl/2015/03/sdc185-use-numbers-or-number.html
Posts tonen met het label Lindy's stamp Gang. Alle posts tonen
woensdag 11 maart 2015
zondag 11 januari 2015
Artists who seek perfection in everything are those who cannot attain it in anything.
I saw a video by France Papillon, whom I really admire, and it inspired me to make this spread. I started out applying texture paste in the middle of the spread and using one of those rubber tools to scrape texture in it. Then I applied turqoise acrylic paint, sprayed it with water and let it run down the page both up and down. After drying I applied a turqoise spray ink by Avec and did the same. I then used Distress inks to colour the background, Antique Linen, Vintage photo and Walnut stain. On the edge I used a little Black Soot.
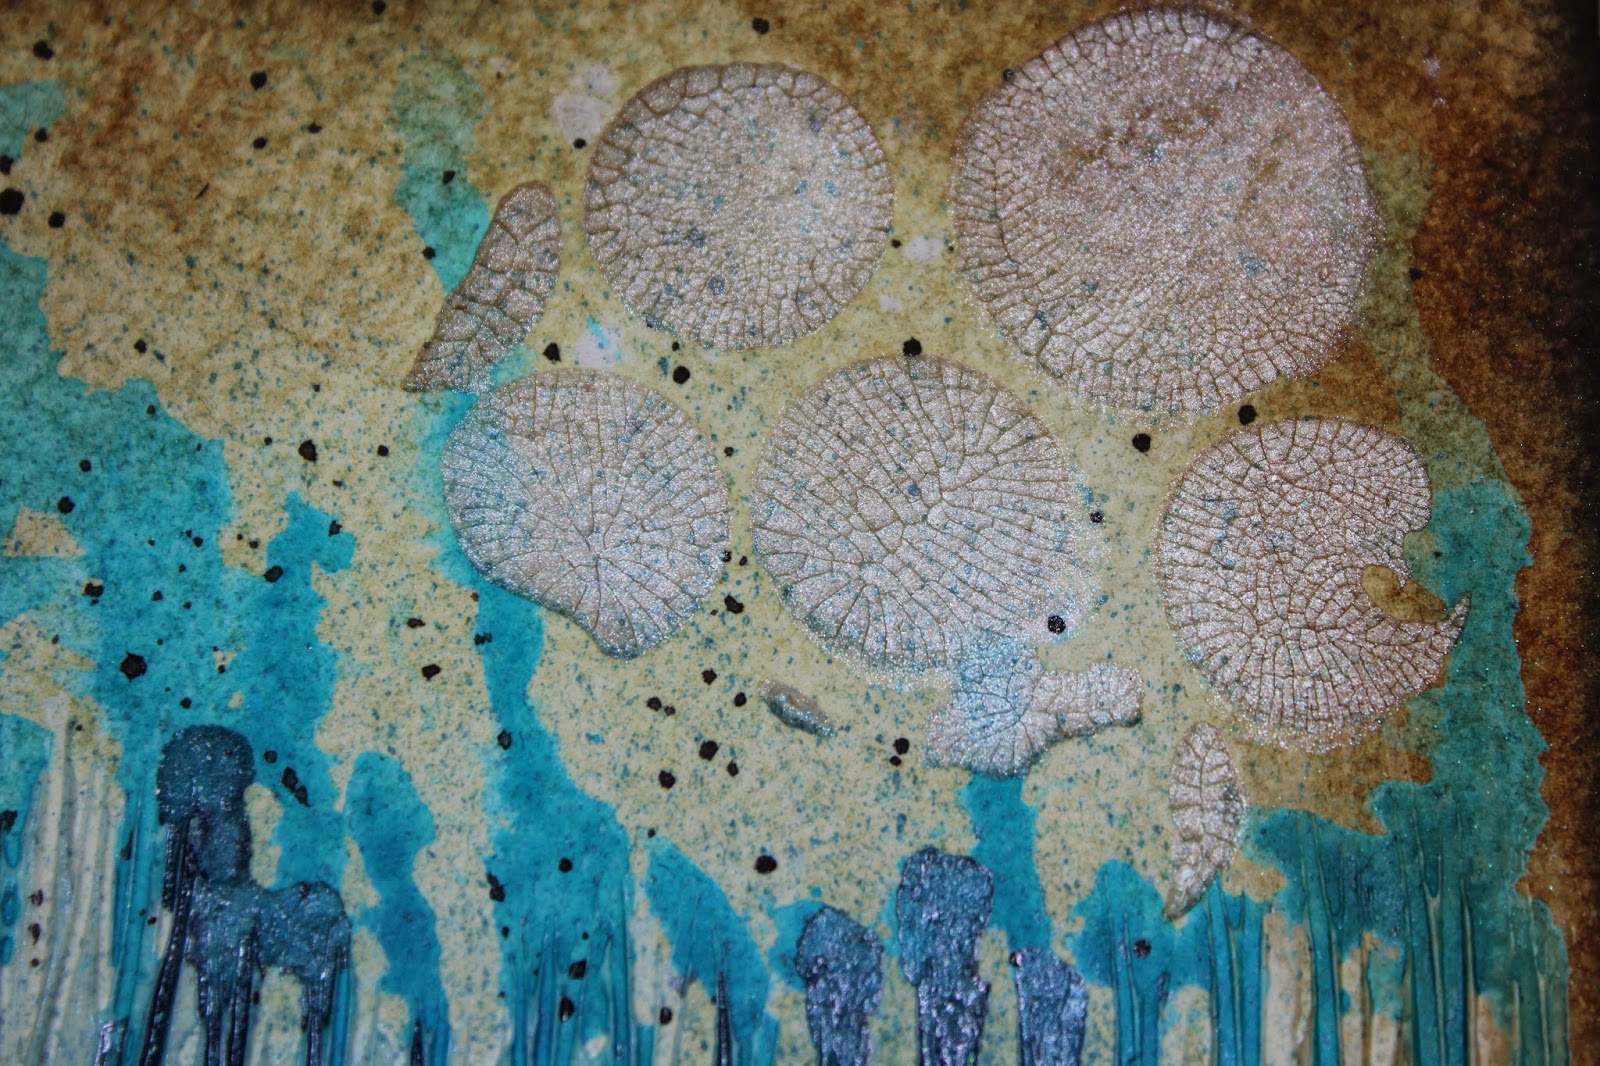
The circles were made with Finnabair Platinum Crackle paste. I also spattered some India Ink on the spread.
I sprayed some fabric and Gips fabric with the Avec spray and Gossamer Gold by LSG and added them in the middle of the spread. I also added some rusted metal pieces.
I typed the quote on my trusted old typewriter and I added some Walnut Stain on the edges. Love this quote.
I hope you enjoyed my spread. Have a great week, hugs Frea
Challenges:
http://lilpatchofcraftyfriends.blogspot.com.au/2015/01/challenge-1.html
http://www.scribbleandscrapcrafts.blogspot.co.uk/2015/01/challenge-35-always-anything-goes.html
http://sentimentalsundays.blogspot.nl/2015/01/challenge-241-winter-sparkle.html
http://artbymiranchallenge.blogspot.ca/2015/01/challenge-23-anything-goes.html
http://wagsnwhiskersrubberstamps.blogspot.nl/2015/01/challenge-145-anything-goes.html
http://creativecraftcottage.blogspot.co.nz/2015/01/challenge-31-anything-goes-7th-january.html
http://myartisticadventureschallenge.blogspot.nl/search/label/challenges
http://rheddscreativespirit.blogspot.co.uk/2015/01/januarys-challenge.html
http://sassystudiodesigns.blogspot.nl/2015/01/dtbst-263-anything-goes.html
The circles were made with Finnabair Platinum Crackle paste. I also spattered some India Ink on the spread.
I sprayed some fabric and Gips fabric with the Avec spray and Gossamer Gold by LSG and added them in the middle of the spread. I also added some rusted metal pieces.
I typed the quote on my trusted old typewriter and I added some Walnut Stain on the edges. Love this quote.
I hope you enjoyed my spread. Have a great week, hugs Frea
Challenges:
http://lilpatchofcraftyfriends.blogspot.com.au/2015/01/challenge-1.html
http://www.scribbleandscrapcrafts.blogspot.co.uk/2015/01/challenge-35-always-anything-goes.html
http://sentimentalsundays.blogspot.nl/2015/01/challenge-241-winter-sparkle.html
http://artbymiranchallenge.blogspot.ca/2015/01/challenge-23-anything-goes.html
http://wagsnwhiskersrubberstamps.blogspot.nl/2015/01/challenge-145-anything-goes.html
http://creativecraftcottage.blogspot.co.nz/2015/01/challenge-31-anything-goes-7th-january.html
http://myartisticadventureschallenge.blogspot.nl/search/label/challenges
http://rheddscreativespirit.blogspot.co.uk/2015/01/januarys-challenge.html
http://sassystudiodesigns.blogspot.nl/2015/01/dtbst-263-anything-goes.html
vrijdag 2 januari 2015
Love history and love vintage!
I just love history and vintage, so this spread is really not a surprise. I have all this lovely glitter stuff that is such a trend nowadays so I went all the way using it. I started by gessoing my pages and gluing tissue tape in the middle. Then I used matte medium to glue down torn pieces of an old book after which I added a layer of transparent gesso. I hoped that three layers would be enough to stop the soaking of this more than horrible paper in the small Dylusions art journal, and so it was. Then I sprayed Dylusions Polished Jade in combination with Lindy's Stamp Gang Gossamer Gold onto my spread, and what a gorgeous combination that turned out to be. Love the depth of the green against the brown gold.
The vintage photo I downloaded from the Internet as a free download. I stamped some vintage images on the background of the spread and then coloured some funny fiber stuff with Distress Stain Gathered Twigs and Tea Dye. The strips of paper were leftovers which I tore and distressed with Walnut Stain. I used a home rusted paperclip to hold them together. At the bottom right side of the photograph I added a round metal embellishment which I also rusted. In the middle I used some gel medium and added green micro beads. About halfway the drying process I formed it into a pearl shape with my fingers. Love the effect.
At the top of the strips I added Glass Glitter by Finnabair, and I just found these glittery 'needles' in all sorts of colours. Love them and I used gel medium again to glue them down.
Again a metal embellishment, but I took this picture to show you the gorgeous shimmer of the Gpssamer Gold on this spread in combination with that deep green. The pictures really don't do it justice, it's much prettier in reality.
Now I just have to show you a close up of this brilliant stamp I gave myself for Christmas; it's by Lost Coast, and I used Antique Copper embossing powder to stamp it. On top I added copper mica flakes.
And here's my little tag with journaling on it.
I do hope you enjoyed my spread. Wishing you all a brilliant, happy, healthy and creative 2015!!
Hugs Frea
Challenges:
http://messymixedmediabyfrea.blogspot.nl/2015/01/love-history-and-love-vintage.html
http://blog.red-rubber-designs.com/2015/01/inspirational-201-new-stamps.html
http://artbymiranchallenge.blogspot.ca/2014/12/challenge-22.html
http://craftycatzweeklychallenge.blogspot.nl/2015/01/challenge-260-anything-goes.html
http://digistamps4joy-sa.blogspot.nl/2014/12/challenge-107-add-glitter.html
http://divasbydesignchallenge.blogspot.nl/2014/12/dec-17th-team-b-anything-goes.html
http://doubleclickconnections.blogspot.nl/2014/12/merry-christmas-eve-new-challenge-here.html
http://whimsyinspires.blogspot.nl/2014/12/whimsy-challenge-78-anything-goes.html
http://frillyandfunkie.blogspot.nl/2014/12/anything-goes.html
http://www.simonsaysstampblog.com/wednesdaychallenge/simon-says-anything-goes-11/
The vintage photo I downloaded from the Internet as a free download. I stamped some vintage images on the background of the spread and then coloured some funny fiber stuff with Distress Stain Gathered Twigs and Tea Dye. The strips of paper were leftovers which I tore and distressed with Walnut Stain. I used a home rusted paperclip to hold them together. At the bottom right side of the photograph I added a round metal embellishment which I also rusted. In the middle I used some gel medium and added green micro beads. About halfway the drying process I formed it into a pearl shape with my fingers. Love the effect.
At the top of the strips I added Glass Glitter by Finnabair, and I just found these glittery 'needles' in all sorts of colours. Love them and I used gel medium again to glue them down.
Now I just have to show you a close up of this brilliant stamp I gave myself for Christmas; it's by Lost Coast, and I used Antique Copper embossing powder to stamp it. On top I added copper mica flakes.
And here's my little tag with journaling on it.
I do hope you enjoyed my spread. Wishing you all a brilliant, happy, healthy and creative 2015!!
Hugs Frea
Challenges:
http://messymixedmediabyfrea.blogspot.nl/2015/01/love-history-and-love-vintage.html
http://blog.red-rubber-designs.com/2015/01/inspirational-201-new-stamps.html
http://artbymiranchallenge.blogspot.ca/2014/12/challenge-22.html
http://craftycatzweeklychallenge.blogspot.nl/2015/01/challenge-260-anything-goes.html
http://digistamps4joy-sa.blogspot.nl/2014/12/challenge-107-add-glitter.html
http://divasbydesignchallenge.blogspot.nl/2014/12/dec-17th-team-b-anything-goes.html
http://doubleclickconnections.blogspot.nl/2014/12/merry-christmas-eve-new-challenge-here.html
http://whimsyinspires.blogspot.nl/2014/12/whimsy-challenge-78-anything-goes.html
http://frillyandfunkie.blogspot.nl/2014/12/anything-goes.html
http://www.simonsaysstampblog.com/wednesdaychallenge/simon-says-anything-goes-11/
zondag 28 december 2014
December 2014, still on time.....just!!
So here's my art journal calendar for December, and in the nick of time too! I made the background with Distress paints in Weathered Wood and Broken China, and when will wet sprayed them with Glimmer Mist Silver and Lindy's Stamp Gang spray Sea Asters. Love love love the effect, it's sort of like a marble. The month was stamped and then painted over with a Molotow red maker and the year I just wrote with the same marker.
The stamps on top and bottom are a border by Lost Coast stamps, brandnew from Santa, and embossed with Bridal embossing powder. Gorgeous don't you think?!
This year I got totally addicted to snowmen, so I had to add one on my spread. I cut it out of an old book and gessoed it so it would look white. Glued it down with matt gel medium and painted the nose, eyes, mouth and buttons on. Also painted the twig arms. Around my snowman I made a shadow with a black gelato so it would stand out more against the background. Now the hat is another day, which is due to lack of room on my page LOL! I initially wanted to give him a top hat....
I diecut the starts and stickled them with Distress Stickles Pumice Stone. Totally finished off a bottle of Distress Stickles Pumice Stone, really had to wring it out in order to stickle the last of the stars LOL! I do live the effect that the Distress Stickles aren't as shiny as the regular Stickles.
Hope you like my spread; I enjoyed making it and have decided to stop my calendar challenge; I started in March 2013 and in fact have sort of had enough of doing calendar pages, so December is a nice month to
pack it in. No worries, there is so much inspiration to do other stuff, I won't get bored yet LOL!
Have a great last couple of days in 2014! Hugs Frea
Challenges:
http://disdigidesignschallenge.blogspot.nl/2014/12/any-winter-holiday-challenge.html
http://sweetstampinchallengeblog.blogspot.nl/2014/12/anything-goes.html
http://artbymiranchallenge.blogspot.ca/2014/12/challenge-22.html
http://qkrstampede.blogspot.co.uk/2014/12/qkr-stampede-challenge.html
http://artisttradingpost.blogspot.co.uk/2014/12/lets-celebrate.html
http://www.trimmiescraftchallenge.blogspot.nl/2014/12/last-challenge-of-2014-challenge-291.html
http://drsdesignsblog.blogspot.nl/search/label/%E2%97%8B%20Challenges
http://milkcoffeechallenge.blogspot.nl/2014/12/make-it-sparkle.html
http://stamplorations.blogspot.nl/p/stamplorations-anything-goes-challenge.html
http://sweet7challenge.blogspot.nl/2014/12/challenge-8-winter.html
The stamps on top and bottom are a border by Lost Coast stamps, brandnew from Santa, and embossed with Bridal embossing powder. Gorgeous don't you think?!
This year I got totally addicted to snowmen, so I had to add one on my spread. I cut it out of an old book and gessoed it so it would look white. Glued it down with matt gel medium and painted the nose, eyes, mouth and buttons on. Also painted the twig arms. Around my snowman I made a shadow with a black gelato so it would stand out more against the background. Now the hat is another day, which is due to lack of room on my page LOL! I initially wanted to give him a top hat....
I diecut the starts and stickled them with Distress Stickles Pumice Stone. Totally finished off a bottle of Distress Stickles Pumice Stone, really had to wring it out in order to stickle the last of the stars LOL! I do live the effect that the Distress Stickles aren't as shiny as the regular Stickles.
Hope you like my spread; I enjoyed making it and have decided to stop my calendar challenge; I started in March 2013 and in fact have sort of had enough of doing calendar pages, so December is a nice month to
pack it in. No worries, there is so much inspiration to do other stuff, I won't get bored yet LOL!
Have a great last couple of days in 2014! Hugs Frea
Challenges:
http://disdigidesignschallenge.blogspot.nl/2014/12/any-winter-holiday-challenge.html
http://sweetstampinchallengeblog.blogspot.nl/2014/12/anything-goes.html
http://artbymiranchallenge.blogspot.ca/2014/12/challenge-22.html
http://qkrstampede.blogspot.co.uk/2014/12/qkr-stampede-challenge.html
http://artisttradingpost.blogspot.co.uk/2014/12/lets-celebrate.html
http://www.trimmiescraftchallenge.blogspot.nl/2014/12/last-challenge-of-2014-challenge-291.html
http://drsdesignsblog.blogspot.nl/search/label/%E2%97%8B%20Challenges
http://milkcoffeechallenge.blogspot.nl/2014/12/make-it-sparkle.html
http://stamplorations.blogspot.nl/p/stamplorations-anything-goes-challenge.html
http://sweet7challenge.blogspot.nl/2014/12/challenge-8-winter.html
donderdag 13 november 2014
Stampotique challenge 'spotlight'.
For the Stampotique challenge 'Spotlight' I made this spread in my selfmade journal. I started out by using some washi tape. I used some modeling paste and a stencil in the middle and in the corners a doily stencil and Deco Art Graphite Paste in order to make some texture. I then covered it all with Fresco Finish paint. After nearly drying I took a baby wipe and wipes the paint back, revealing parts of the stenciling.
I took a scrap piece of paper, painted it mauve with Fresco Finish and then used their crackle glaze and a pink colour on top. I cut out the circle and the tag. I stamped the Stampotique girl on the background and coloured in that part within the circle with Copic markers, and then glued the circle down. I added some Glossy Accents on the heart of her shirt. Around the circle I made some shading with Inktense pencils. I used the same pencils to make the ground she's standing on.
With some Lindy's Stamp Gang I coloured a piece of cambric. I used the leftover on my mat on the leftover piece of paper from the tag and circle. I then layered the pieces and stitched them together on my sewing machine after which I wrote down the sentiment on the tag. All the shading was made with the Inktense pencils and to was the edging around the pages. I used some gel medium to apply some glass glitter on top of the tag. As a final touch I made some splatters with the LSG spray I used to colour the cambric.
I hope you like my spread; I thought it turned out kind of cool. So I'm entering this spread into the Stampotique Designer Challenge. Have a great day! Hugs Frea
http://stampotiquedesignerschallenge.blogspot.nl/2014/11/sdc-november-2014-challenge-links.html
I took a scrap piece of paper, painted it mauve with Fresco Finish and then used their crackle glaze and a pink colour on top. I cut out the circle and the tag. I stamped the Stampotique girl on the background and coloured in that part within the circle with Copic markers, and then glued the circle down. I added some Glossy Accents on the heart of her shirt. Around the circle I made some shading with Inktense pencils. I used the same pencils to make the ground she's standing on.
With some Lindy's Stamp Gang I coloured a piece of cambric. I used the leftover on my mat on the leftover piece of paper from the tag and circle. I then layered the pieces and stitched them together on my sewing machine after which I wrote down the sentiment on the tag. All the shading was made with the Inktense pencils and to was the edging around the pages. I used some gel medium to apply some glass glitter on top of the tag. As a final touch I made some splatters with the LSG spray I used to colour the cambric.
I hope you like my spread; I thought it turned out kind of cool. So I'm entering this spread into the Stampotique Designer Challenge. Have a great day! Hugs Frea
http://stampotiquedesignerschallenge.blogspot.nl/2014/11/sdc-november-2014-challenge-links.html
dinsdag 21 oktober 2014
Wacky? Me?? And that would be a problem because ...... ??
I started this spread with my brandnew Dylusions Pommegranate Seed. Love the colour but it's a little dark for me so I diluted it with about 50% water. The colour then turns slightly purple. I combined it with a pink glimmer spray by Avec. Then I sprayed some Dylusions white through a stencil. I used Raspberry Silks through a burlap stemcil to add texture to the background. The large letters are stickers and I embossed them with Lindy's Stamp Gang embossing powder Royal Burgundy Blu. I used some Stampers Anonymous stamps in the background.
I added purple Viva 3D texture paste through a heart stencil and a purple Inktense pencil to add some shading to the hearts.
Now she does look pretty wacky doesn't she?? I stamped her onto the background, then stamped her on Copic paper en coloured her in with my Copic markers. She too had some shading added to her with my purple Inktense pencil.
The rest of the text was handwritten by me with a black permanent marker. I added some washi tape here and there and distressed the edges of the spread with Royal Purple Stazon.
So, another one done. Hope you like this ons. It's very stormy here in the Netherlands, so I think my hobbyroom is the space to be right now. Hugs Frea
Challenges:
http://partytimetuesdays.blogspot.ca/2014/10/ptt-186-challenge-anything-goes-theme.html
http://www.ttcrd.blogspot.nl/2014/10/ttcrd-challenge-0ct-21-oct-27.html
http://www.sparklingblackrose-craftmylife.blogspot.co.uk/2014/10/all-crafts-challenge-octobernovember.html
http://craftcreatoins.blogspot.nl/p/new-challenge.html
http://notjustcardschallenges.blogspot.co.uk/2014/10/challenge-4.html
http://craft-roomchallenge.blogspot.nl/2014/10/make-your-own-background.html
http://www.simonsaysstampblog.com/mondaychallenge/?p=2106
http://addicted-to-stamps-challenge.blogspot.co.uk/2014/10/challenge-89.html
http://lauralcraft.weebly.com/dragonfly-dreams-challenge/challenge-10-mainly-pink
I added purple Viva 3D texture paste through a heart stencil and a purple Inktense pencil to add some shading to the hearts.
Now she does look pretty wacky doesn't she?? I stamped her onto the background, then stamped her on Copic paper en coloured her in with my Copic markers. She too had some shading added to her with my purple Inktense pencil.
The rest of the text was handwritten by me with a black permanent marker. I added some washi tape here and there and distressed the edges of the spread with Royal Purple Stazon.
So, another one done. Hope you like this ons. It's very stormy here in the Netherlands, so I think my hobbyroom is the space to be right now. Hugs Frea
Challenges:
http://partytimetuesdays.blogspot.ca/2014/10/ptt-186-challenge-anything-goes-theme.html
http://www.ttcrd.blogspot.nl/2014/10/ttcrd-challenge-0ct-21-oct-27.html
http://www.sparklingblackrose-craftmylife.blogspot.co.uk/2014/10/all-crafts-challenge-octobernovember.html
http://craftcreatoins.blogspot.nl/p/new-challenge.html
http://notjustcardschallenges.blogspot.co.uk/2014/10/challenge-4.html
http://craft-roomchallenge.blogspot.nl/2014/10/make-your-own-background.html
http://www.simonsaysstampblog.com/mondaychallenge/?p=2106
http://addicted-to-stamps-challenge.blogspot.co.uk/2014/10/challenge-89.html
http://lauralcraft.weebly.com/dragonfly-dreams-challenge/challenge-10-mainly-pink
zondag 19 oktober 2014
Journey, Time, Fly; Life Moments...
This spread I made in my selfmade Donna Downey journal. I started by covering the pages with transparant geso since I knew I would be using inks en sprays. I added some modeling paste through a stencil to create texture and with acrylic ink and another I added some more interest to the background. Then I glued down some frayed peaces of stamped linen. These tags I used are by Ephemera's garden; all you have to do is print them
out in the size you want them. All the tags used on this spread are
from one set.If you look at that blue green tag you will see a mystical kind of creature; I really like this design!
Here you can see the other side of the spread with the inclusion flipped over.
I sprayed the background with Lindy's Stamp Gang sprays Steampunk Sepia and Turbine Teal. Love the shimmer and the way these inks dry. After drying a made some splatters with Steeampunk Sepia to give it some more texture.
I glued them down on cardstock to give them some solidity since printer paper is quite thin. I then distressed the edges with a paper distresser and added D.I. Walnut Stain.
Here is a detailpicture which shows the shimmer of the paints and the texture of the modeling paste.
Here you can see what the effect is of the drops of the spray after letting the first layer dry.
The textstamps are by Stampers Anonymous, and the Memories stamp is a really old stamp I've had for ages by Inkadinkado. Hope you enjoyed my spread. Have a great Sunday! Hugs Frea
Challenges:
http://treasuredtimesrubberstampschallenges.blogspot.nl/2014/10/challenge-27.html
http://aagwat.blogspot.co.uk/2014/10/challenge-03.html
http://alteredeclectics.blogspot.co.uk/2014/10/another-month-another-challenge.html
http://craftingattheweekend.blogspot.co.uk/2014/09/challenge-6-and-new-design-team.html
http://disdigidesignschallenge.blogspot.nl/2014/10/mystical-creatures-challenge.html
http://countryviewchallenges.blogspot.co.uk/2014/10/welcome-to-octobers-challenge.html
http://pictureandscrap.blogspot.nl/2014/10/udfordring-84-brug-blomster.html
http://thesistersofcraft.blogspot.co.uk/2014/10/sisters-of-craft-october-anything-goes.html
Here you can see the other side of the spread with the inclusion flipped over.
I sprayed the background with Lindy's Stamp Gang sprays Steampunk Sepia and Turbine Teal. Love the shimmer and the way these inks dry. After drying a made some splatters with Steeampunk Sepia to give it some more texture.
I glued them down on cardstock to give them some solidity since printer paper is quite thin. I then distressed the edges with a paper distresser and added D.I. Walnut Stain.
The textstamps are by Stampers Anonymous, and the Memories stamp is a really old stamp I've had for ages by Inkadinkado. Hope you enjoyed my spread. Have a great Sunday! Hugs Frea
Challenges:
http://treasuredtimesrubberstampschallenges.blogspot.nl/2014/10/challenge-27.html
http://aagwat.blogspot.co.uk/2014/10/challenge-03.html
http://alteredeclectics.blogspot.co.uk/2014/10/another-month-another-challenge.html
http://craftingattheweekend.blogspot.co.uk/2014/09/challenge-6-and-new-design-team.html
http://disdigidesignschallenge.blogspot.nl/2014/10/mystical-creatures-challenge.html
http://countryviewchallenges.blogspot.co.uk/2014/10/welcome-to-octobers-challenge.html
http://pictureandscrap.blogspot.nl/2014/10/udfordring-84-brug-blomster.html
http://thesistersofcraft.blogspot.co.uk/2014/10/sisters-of-craft-october-anything-goes.html
woensdag 8 oktober 2014
Do you love Halloween too?? I do, especially this one, the vintage way!
I made this spread in my Round Robin album again. Love that side of it, it's just large enough but not that large that you sometimes don't know how to fill the pages. Anyhow, I get some lovely printables each week from Ephemera's garden which I really really love, and this weer there were these gorgeous vintage tags, and I couldn't wait to get started with them. I printed them, glued them to cardstock and distressed them. I just love Halloween, but here in the Netherlands it's not really celebrated. These vintage tags have this wonderful atmosphere and I did my best to have that feeling in my spread. Quite happy on how it turned out. I started with a sheet of Prima paper for a background and added gesso on part of it, followed by some Viva Decor Crackle Paste through a stencil.
Then I sprayed some LSG Gossamer Gold spray on the crackle and it turned out gorgeous. Love love love the effect!
My friend Astrid gave me some gauze like stuff, very hard and sturdy but when wetted you can sort of pull it apart. So I coloured it with Distress Stains in browns and oranges.So this is how the spread turned out.
I added glass glitter in copper colour and some orange beads here and there with gel medium. The lace was coloured with black Dylusions. As a final touch I added some LSG Fuzzy Navel Peach drippage and splatters to gett some orange in there.
I hope you like my Halloween page. Have a great week, hugs Frea
Challenges :
http://pictureandscrap.blogspot.nl/2014/10/udfordring-83-brug-dies.html
http://bearlymine-challenges.blogspot.co.uk/2014/10/october-2014-challenge-halloween.html
http://alteredeclectics.blogspot.co.uk/2014/09/dt-call-dt-calldt-call.html
http://agirlwhocraftschalengeblog.blogspot.co.uk/2014/10/spooky-special-challenge.html
http://paulaholifieldcrafts.blogspot.co.uk/2014/10/albc-boo.html
http://abc-challenge.blogspot.com.au/2014/10/u-is-for-unique.html
http://thesistersofcraft.blogspot.co.uk/2014/10/sisters-of-craft-october-anything-goes.html
http://www.themirrorcrack1d.blogspot.co.uk/2014/10/2-body-beautiful-something-featuring.html
http://sandee-and-amelie.blogspot.co.at/2014/10/steampunk-couture-october-challenge.html
http://ladybugcrafts.blogspot.nl/2014/10/october-challenge-august-winner.html
http://myartisticadventureschallenge.blogspot.nl/2014/10/my-artistic-adventures-challenge-10.html
http://rheddscreativespirit.blogspot.co.uk/2014/10/october-challengehalloween-or-not.html
http://thesistersofcraft.blogspot.co.uk/2014/10/sisters-of-craft-october-anything-goes.html
http://www.ttcrd.blogspot.nl/2014/10/ttcrd-anything-goes-challenge-october.html
http://www.sparklingblackrose-craftmylife.blogspot.co.uk/2014/10/all-crafts-challenge-octobernovember.html
http://www.craftysentiments.blogspot.nl/2014/10/anything-goes-good-morning-sweet.html
http://papertakeweekly.blogspot.nl/2014/10/anything-goes.html
Then I sprayed some LSG Gossamer Gold spray on the crackle and it turned out gorgeous. Love love love the effect!
My friend Astrid gave me some gauze like stuff, very hard and sturdy but when wetted you can sort of pull it apart. So I coloured it with Distress Stains in browns and oranges.So this is how the spread turned out.
I added glass glitter in copper colour and some orange beads here and there with gel medium. The lace was coloured with black Dylusions. As a final touch I added some LSG Fuzzy Navel Peach drippage and splatters to gett some orange in there.
I hope you like my Halloween page. Have a great week, hugs Frea
Challenges :
http://pictureandscrap.blogspot.nl/2014/10/udfordring-83-brug-dies.html
http://bearlymine-challenges.blogspot.co.uk/2014/10/october-2014-challenge-halloween.html
http://alteredeclectics.blogspot.co.uk/2014/09/dt-call-dt-calldt-call.html
http://agirlwhocraftschalengeblog.blogspot.co.uk/2014/10/spooky-special-challenge.html
http://paulaholifieldcrafts.blogspot.co.uk/2014/10/albc-boo.html
http://abc-challenge.blogspot.com.au/2014/10/u-is-for-unique.html
http://thesistersofcraft.blogspot.co.uk/2014/10/sisters-of-craft-october-anything-goes.html
http://www.themirrorcrack1d.blogspot.co.uk/2014/10/2-body-beautiful-something-featuring.html
http://sandee-and-amelie.blogspot.co.at/2014/10/steampunk-couture-october-challenge.html
http://ladybugcrafts.blogspot.nl/2014/10/october-challenge-august-winner.html
http://myartisticadventureschallenge.blogspot.nl/2014/10/my-artistic-adventures-challenge-10.html
http://rheddscreativespirit.blogspot.co.uk/2014/10/october-challengehalloween-or-not.html
http://thesistersofcraft.blogspot.co.uk/2014/10/sisters-of-craft-october-anything-goes.html
http://www.ttcrd.blogspot.nl/2014/10/ttcrd-anything-goes-challenge-october.html
http://www.sparklingblackrose-craftmylife.blogspot.co.uk/2014/10/all-crafts-challenge-octobernovember.html
http://www.craftysentiments.blogspot.nl/2014/10/anything-goes-good-morning-sweet.html
http://papertakeweekly.blogspot.nl/2014/10/anything-goes.html
zaterdag 4 oktober 2014
Autumn in my home made Donna Downey album.
Hi everyone, this spread I made in my self made Donna Downey album. It's got this lovely autumn like feel to it, even though the items used are not reminiscent of autumn. Maybe is the colours, must be that!
Some close ups of details. The flowers made with a stencil and modeling paste and applying Inca Gold after drying.
The little dots by applying gesso through a stencil before applying the spray inks by LSG. The stamps are by Tim Holtz again, like my last spread.
Have a great weekend everyone! Hugs Frea
Challenges:
http://aagwat.blogspot.co.uk/2014/10/challenge-01.html
http://artbymiranchallenge.blogspot.ca/2014/10/challenge-16-anything-goes.html
http://brownsugarchallenge.blogspot.nl/2014/10/challenge-114-autumnfall.html
http://creativecornerchallenges.blogspot.de/
http://www.frosteddesigns.blogspot.nl/2014/09/fall-into-new-friday-challenge.html
http://graphitmarkers.blogspot.co.uk/2014/10/wk-40autumn-colours-graphit-colouring.html
http://qkrstampede.blogspot.co.uk/2014/10/qkr-stampede-challenge-107-anything-goes.html
http://wagsnwhiskersrubberstamps.blogspot.nl/2014/10/challenge-139-fall-colors.html
http://www.charismacardz.blogspot.nl/2014/09/anything-but-card.html
Some close ups of details. The flowers made with a stencil and modeling paste and applying Inca Gold after drying.
The little dots by applying gesso through a stencil before applying the spray inks by LSG. The stamps are by Tim Holtz again, like my last spread.
Challenges:
http://aagwat.blogspot.co.uk/2014/10/challenge-01.html
http://artbymiranchallenge.blogspot.ca/2014/10/challenge-16-anything-goes.html
http://brownsugarchallenge.blogspot.nl/2014/10/challenge-114-autumnfall.html
http://creativecornerchallenges.blogspot.de/
http://www.frosteddesigns.blogspot.nl/2014/09/fall-into-new-friday-challenge.html
http://graphitmarkers.blogspot.co.uk/2014/10/wk-40autumn-colours-graphit-colouring.html
http://qkrstampede.blogspot.co.uk/2014/10/qkr-stampede-challenge-107-anything-goes.html
http://wagsnwhiskersrubberstamps.blogspot.nl/2014/10/challenge-139-fall-colors.html
http://www.charismacardz.blogspot.nl/2014/09/anything-but-card.html
maandag 29 september 2014
Just a little spread.
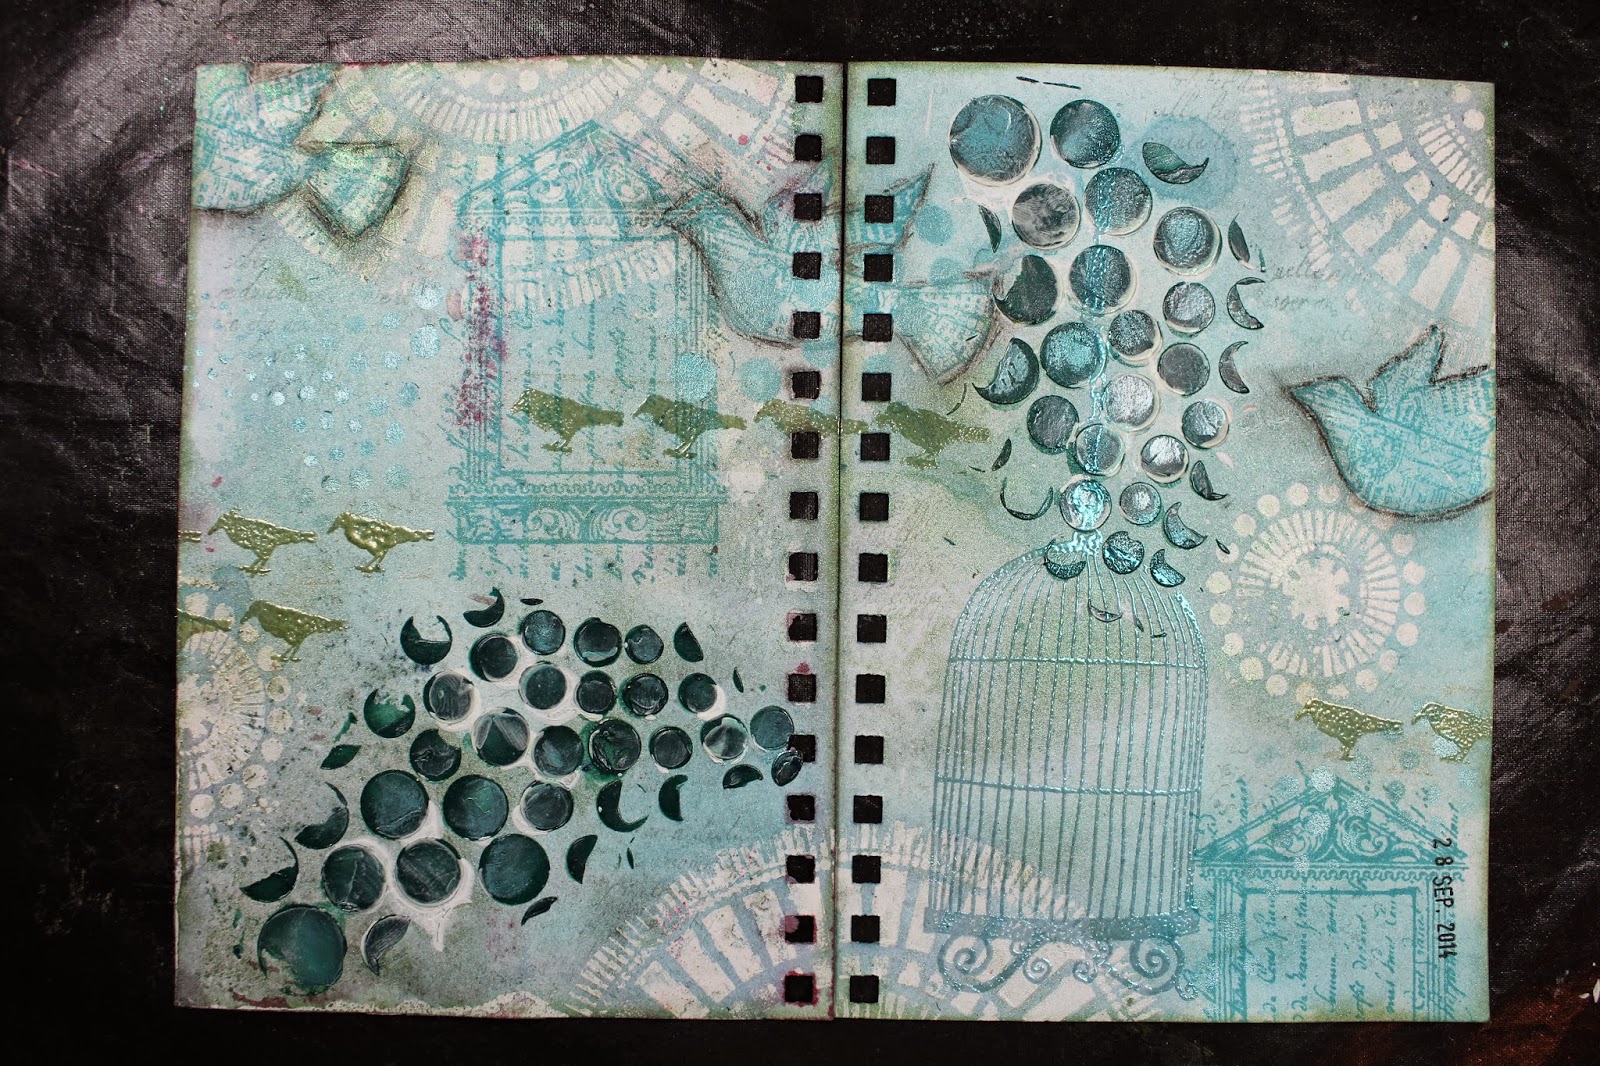
I made this spread in my Round Robin album; I had some leftover gel medium and used it through a stencil making the circles. Then I used some home made glimmer sprays to spray the background, the gel medium works as a resist.
Then I stamped the three birds and the shrine like stamps with the script with Ranger Archival ink Aquamarine. I added Charcoal around the birds to give them some depth.
I took out some gel medium and mixed it up with LSG Magicals, Ponderosa Pine Needles ad Bachelor Button Blue and used it through a TCW circle stencil. After drying it, I took some gesso and applied it with my fingers using the same stencil in exactly the same place.
With soft grey ink I stamped some script in the background. Then I used LSG embossing powder Morning Glory Azure to stamp the birdcage and Oakleaf Olive for the small birds. Finally I distressed the edges with Bundled Sage Distress ink.
I hope you enjoyed my little spread and the steps I described to make it. Have a great week, hugs Frea
Challenges:
http://notjustcardschallenges.blogspot.co.uk/2014/09/challenge-03.html
http://craftcreatoins.blogspot.nl/p/new-challenge.html
http://www.craftybloggersnetwork.blogspot.nl/2014/09/september-challenge-at-crafty-bloggers.html
http://craftingfromtheheartchallengeblog.blogspot.nl/2014/09/challenge-38.html
http://squigglefly.blogspot.nl/2014/09/squigglefly-challenge-sfc3914.html
http://stampandcreateblog.blogspot.nl/search/label/Challenge
http://www.flonzcraft.com/vsc/?p=1637
http://craftingattheweekend.blogspot.co.uk/2014/09/challenge-6-and-new-design-team.html
http://brownsugarchallenge.blogspot.nl/2014/09/challenge-113-anything-goes.html
http://www.craftforthecraic.blogspot.ie/2014/09/september-challenge-8-something-with.html
http://blog.docerelashop.com/2014/09/design-team-post-challenge-70-anything.html
Then I stamped the three birds and the shrine like stamps with the script with Ranger Archival ink Aquamarine. I added Charcoal around the birds to give them some depth.
I took out some gel medium and mixed it up with LSG Magicals, Ponderosa Pine Needles ad Bachelor Button Blue and used it through a TCW circle stencil. After drying it, I took some gesso and applied it with my fingers using the same stencil in exactly the same place.
With soft grey ink I stamped some script in the background. Then I used LSG embossing powder Morning Glory Azure to stamp the birdcage and Oakleaf Olive for the small birds. Finally I distressed the edges with Bundled Sage Distress ink.
I hope you enjoyed my little spread and the steps I described to make it. Have a great week, hugs Frea
Challenges:
http://notjustcardschallenges.blogspot.co.uk/2014/09/challenge-03.html
http://craftcreatoins.blogspot.nl/p/new-challenge.html
http://www.craftybloggersnetwork.blogspot.nl/2014/09/september-challenge-at-crafty-bloggers.html
http://craftingfromtheheartchallengeblog.blogspot.nl/2014/09/challenge-38.html
http://squigglefly.blogspot.nl/2014/09/squigglefly-challenge-sfc3914.html
http://stampandcreateblog.blogspot.nl/search/label/Challenge
http://www.flonzcraft.com/vsc/?p=1637
http://craftingattheweekend.blogspot.co.uk/2014/09/challenge-6-and-new-design-team.html
http://brownsugarchallenge.blogspot.nl/2014/09/challenge-113-anything-goes.html
http://www.craftforthecraic.blogspot.ie/2014/09/september-challenge-8-something-with.html
http://blog.docerelashop.com/2014/09/design-team-post-challenge-70-anything.html
zondag 14 september 2014
Youer than you.....
This spread I made in my small Dylusions Journal. The background was made with Grey Dylusions and LSG spray Cotton Candy Pink and Rambling Rose Pink.
I stamped a Dylusions girl and coloured her up with Copics. I added Stickles to the dots on her dress and Glossy accents on her boots. I used some striped washi tape here and there.
I used a stencil for the little grey squares with acrylic paint and did some white drippage with gesso. The cirles were made with bottle tops and gesso and the strips with an old gift card. I stamped with embossing ink and Ranger Cement embossing powder.
Around the edges I doodles some and I wrote the text with a white sharpie edging it with an Identipen in black. The quote is by Dr. Seuss.
Hope you like my spread, I enjoyed making it. Ha ve a great week. Hugs Frea
Challenges:
http://avenue613.blogspot.nl/2014/09/challenge-89-anything-goes.html
http://www.scribbleandscrapcrafts.blogspot.co.uk/2014/09/challenge-27-anything-goes-and-candy.html
http://suzypantssmarty.blogspot.co.uk/2014/09/suzy-bees-bloomin-challenge-46.html
http://treasuredtimesrubberstampschallenges.blogspot.nl/2014/09/challenge-24.html
I stamped a Dylusions girl and coloured her up with Copics. I added Stickles to the dots on her dress and Glossy accents on her boots. I used some striped washi tape here and there.
I used a stencil for the little grey squares with acrylic paint and did some white drippage with gesso. The cirles were made with bottle tops and gesso and the strips with an old gift card. I stamped with embossing ink and Ranger Cement embossing powder.
Around the edges I doodles some and I wrote the text with a white sharpie edging it with an Identipen in black. The quote is by Dr. Seuss.
Hope you like my spread, I enjoyed making it. Ha ve a great week. Hugs Frea
Challenges:
http://avenue613.blogspot.nl/2014/09/challenge-89-anything-goes.html
http://www.scribbleandscrapcrafts.blogspot.co.uk/2014/09/challenge-27-anything-goes-and-candy.html
http://suzypantssmarty.blogspot.co.uk/2014/09/suzy-bees-bloomin-challenge-46.html
http://treasuredtimesrubberstampschallenges.blogspot.nl/2014/09/challenge-24.html
zaterdag 9 augustus 2014
100 Times Journal on Monday by France Papillon, so here's my step by step tutorial.
I wanted to make a spread in my large Dylusion journal and started by picking out two doublesided papers.
I cut various strips and ended up using only three of the four sides, because one side had some purple in it which I didn't like in combination with the others. I distressed the strips with Stazon since I knew I would be using wet mediums afterwards and didn't want my distressing to run.
I moved the strips over my pages until I had an arrangement which I liked. Then I glued them down with Tacky Glue. I didn't use gel medium because I wanted to work with Bister and the gel medium would work as a resist which I didn't want.
I borrowed a baroque stencil by Donna Downey from my sweet sister Annika (actually, she wasn't here so I just took it LOL), THANKS SWEETY hihi, and used it to create some texture in the background.
Then I created a resist in the background using Antique Linen Distress paint and a stencil made by my friend Astrid (which she sells in her webshop, and she also has brilliant sets of holiday stencils which have a smaller size and are so convenient to take along in your holiday kit, so click here to check them out SB Creatief ).
I decided there still wasn't enough going on in the background so I took a script stamp and Distress Paint Rusty Hinge and stamped some script..
I did some stamping with the Tim Holtz butterflies.
And I used the stamp with the text from that same set here and there. Both were stamped with Stazon Ganache.
The last touch was distressing the edges of the spread using the same colour of Stazon.
So France and blogfriends, I hope you enjoyed my step by step tut; I enjoyed making it, and France; congratulations on your 100th JOM, thanks for all the inspiration and on to the 200!! See you in October at the Craftorij retreat weekend France!!
I cut various strips and ended up using only three of the four sides, because one side had some purple in it which I didn't like in combination with the others. I distressed the strips with Stazon since I knew I would be using wet mediums afterwards and didn't want my distressing to run.
I moved the strips over my pages until I had an arrangement which I liked. Then I glued them down with Tacky Glue. I didn't use gel medium because I wanted to work with Bister and the gel medium would work as a resist which I didn't want.
I borrowed a baroque stencil by Donna Downey from my sweet sister Annika (actually, she wasn't here so I just took it LOL), THANKS SWEETY hihi, and used it to create some texture in the background.
Then I created a resist in the background using Antique Linen Distress paint and a stencil made by my friend Astrid (which she sells in her webshop, and she also has brilliant sets of holiday stencils which have a smaller size and are so convenient to take along in your holiday kit, so click here to check them out SB Creatief ).
I decided there still wasn't enough going on in the background so I took a script stamp and Distress Paint Rusty Hinge and stamped some script..
Then came the fun bit; not this Bister stuff is quite new to me; my sister ordered it for us and we have all the colours, but it does take some getting used to. I used mahogany and natural for this page, but the mahogany was much redder than I expected.
So here's the result of the spread with the Bister. For me the contrast between the colour of the background paper and the Bister was too strong so I decided to tune it down with some Lindy's Stamp Gang spray.
After doing so (I used Jolly Roger Red) this was the result. Much better I think.I did some stamping with the Tim Holtz butterflies.
And I used the stamp with the text from that same set here and there. Both were stamped with Stazon Ganache.
The last touch was distressing the edges of the spread using the same colour of Stazon.
So France and blogfriends, I hope you enjoyed my step by step tut; I enjoyed making it, and France; congratulations on your 100th JOM, thanks for all the inspiration and on to the 200!! See you in October at the Craftorij retreat weekend France!!
Abonneren op:
Posts (Atom)