Don't you just love fairies?? I do, and I couldn't resist this gorgeous stamp by Lost Coast. I made a background with a brayer and Fresco Finish paints. Then I did some stamping and I used a stencil with some dark Fresco Finish paint.
With the border of a Dylusion stencil and sparkle medium by Imagination Crafts I made this border on both pages.
In a magazine called Flow there were these transparent stickers with some lovely quotes amongst which this one. I added it to the spread en to take away the shine from the plastic I added two layers of matte gel medium on top. Now it actually looks like I stamped it straight onto the background.
Now both the fairy and the dragonflies were stamped with embossing powder by Lindy's Stamp Gang Midnight Teal. Love that colour and it really matched the colours of the spread.
En thoroughly enjoyed making this spread. wishing you a wonderfull week, hugs Frea
Challenges:
http://avenue613.blogspot.nl/2015/01/challenge-108-anything-goes-woptional.html
http://stampedblessings.com/2015/01/amusing-challenge-anything-goes-15/
http://lilpatchofcraftyfriends.blogspot.com.au/2015/01/challenge-2.html
http://scribbleandscrapcrafts.blogspot.co.uk/2015/01/challenge-36-anything-goes-and-candy.html
http://kitandclowder.ning.com/january-challenge
Posts tonen met het label Embossing. Alle posts tonen
maandag 26 januari 2015
dinsdag 21 oktober 2014
Wacky? Me?? And that would be a problem because ...... ??
I started this spread with my brandnew Dylusions Pommegranate Seed. Love the colour but it's a little dark for me so I diluted it with about 50% water. The colour then turns slightly purple. I combined it with a pink glimmer spray by Avec. Then I sprayed some Dylusions white through a stencil. I used Raspberry Silks through a burlap stemcil to add texture to the background. The large letters are stickers and I embossed them with Lindy's Stamp Gang embossing powder Royal Burgundy Blu. I used some Stampers Anonymous stamps in the background.
I added purple Viva 3D texture paste through a heart stencil and a purple Inktense pencil to add some shading to the hearts.
Now she does look pretty wacky doesn't she?? I stamped her onto the background, then stamped her on Copic paper en coloured her in with my Copic markers. She too had some shading added to her with my purple Inktense pencil.
The rest of the text was handwritten by me with a black permanent marker. I added some washi tape here and there and distressed the edges of the spread with Royal Purple Stazon.
So, another one done. Hope you like this ons. It's very stormy here in the Netherlands, so I think my hobbyroom is the space to be right now. Hugs Frea
Challenges:
http://partytimetuesdays.blogspot.ca/2014/10/ptt-186-challenge-anything-goes-theme.html
http://www.ttcrd.blogspot.nl/2014/10/ttcrd-challenge-0ct-21-oct-27.html
http://www.sparklingblackrose-craftmylife.blogspot.co.uk/2014/10/all-crafts-challenge-octobernovember.html
http://craftcreatoins.blogspot.nl/p/new-challenge.html
http://notjustcardschallenges.blogspot.co.uk/2014/10/challenge-4.html
http://craft-roomchallenge.blogspot.nl/2014/10/make-your-own-background.html
http://www.simonsaysstampblog.com/mondaychallenge/?p=2106
http://addicted-to-stamps-challenge.blogspot.co.uk/2014/10/challenge-89.html
http://lauralcraft.weebly.com/dragonfly-dreams-challenge/challenge-10-mainly-pink
I added purple Viva 3D texture paste through a heart stencil and a purple Inktense pencil to add some shading to the hearts.
Now she does look pretty wacky doesn't she?? I stamped her onto the background, then stamped her on Copic paper en coloured her in with my Copic markers. She too had some shading added to her with my purple Inktense pencil.
The rest of the text was handwritten by me with a black permanent marker. I added some washi tape here and there and distressed the edges of the spread with Royal Purple Stazon.
So, another one done. Hope you like this ons. It's very stormy here in the Netherlands, so I think my hobbyroom is the space to be right now. Hugs Frea
Challenges:
http://partytimetuesdays.blogspot.ca/2014/10/ptt-186-challenge-anything-goes-theme.html
http://www.ttcrd.blogspot.nl/2014/10/ttcrd-challenge-0ct-21-oct-27.html
http://www.sparklingblackrose-craftmylife.blogspot.co.uk/2014/10/all-crafts-challenge-octobernovember.html
http://craftcreatoins.blogspot.nl/p/new-challenge.html
http://notjustcardschallenges.blogspot.co.uk/2014/10/challenge-4.html
http://craft-roomchallenge.blogspot.nl/2014/10/make-your-own-background.html
http://www.simonsaysstampblog.com/mondaychallenge/?p=2106
http://addicted-to-stamps-challenge.blogspot.co.uk/2014/10/challenge-89.html
http://lauralcraft.weebly.com/dragonfly-dreams-challenge/challenge-10-mainly-pink
woensdag 15 oktober 2014
Valentine in October???
It would seem that way LOL! Actually, my sweet friends Annika and Astrid and me had a nicve craft evening yesterdag and Annika thought a challenge might be nice. She thought of the colour red, Astrid added the idea of using hearts and I felt some glitter was in order. So there you are; Valentine's day!!
I tried something new for the background; I sprayed some Glimmer Mist silver and Grey and Black Dylusions on a gelli plate and layed my paper on it. Love the effect, it's totally different from spraying on your paper. Then I made the fishbone with a stencil and black gesso around the pages. I doodled a little here and there. Then I made the small glitter hearts with a stencil my sweet friend Astrid made for me and Viva Glitter Gel Hematit. I used a red Molotov Marker to edge the hearts and let one heart on each page stand out by using some Stickles.
The large hearts were made with an ancient Sizzlit Die set in multiple layers. Two of the hearts were embossed using embossing powder, one with ultra fine Flower Soft and one with Liquitex liquid ink.
At the top of one of the hearts on each page I added some red glitter parts en a sort of heap. Around the hearts I made a shading with a black carbon pencil.
I stamped tiny hearts all over the page, and on the left page made a few of them dimensional and shiny with a red Viva Pearl pen. With white Liquitex liquid ink I made splatters on the pages and with Black Soot Distress ink I distressed the pages on the edge.
Love the way this spread turned out. Hearts are cool, even in October LOL!! Have a great day, hugs Frea
Challenges:
http://www.sparklingblackrose-craftmylife.blogspot.co.uk/2014/10/all-crafts-challenge-octobernovember.html
http://artisticinspirationschallenges.blogspot.co.uk/2014/10/challenge-113-anything-goes-make-your.html
http://craftingfromtheheartchallengeblog.blogspot.nl/2014/10/challenge-40.html
http://craft-roomchallenge.blogspot.nl/2014/10/make-your-own-background.html
http://partytimetuesdays.blogspot.ca/2014/10/ptt-185-anything-goes-theme.html
http://www.ttcrd.blogspot.nl/2014/10/through-craftroom-doors-challenge.html
http://notjustcardschallenges.blogspot.co.uk/2014/10/challenge-4.html
http://sparklensprinklecreativechallenges.blogspot.nl/2014/10/october-2014-challenge.html
http://thepapernestdollschallenge.blogspot.nl/2014/10/ch-21-guest-designeranything-goes.html
http://dreamvalleychallenges.blogspot.ca/2014/10/challenge-92-anything-but-card.html
http://www.scribbleandscrapcrafts.blogspot.co.uk/2014/10/challenge-29-always-anything-goes-3.html
I tried something new for the background; I sprayed some Glimmer Mist silver and Grey and Black Dylusions on a gelli plate and layed my paper on it. Love the effect, it's totally different from spraying on your paper. Then I made the fishbone with a stencil and black gesso around the pages. I doodled a little here and there. Then I made the small glitter hearts with a stencil my sweet friend Astrid made for me and Viva Glitter Gel Hematit. I used a red Molotov Marker to edge the hearts and let one heart on each page stand out by using some Stickles.
The large hearts were made with an ancient Sizzlit Die set in multiple layers. Two of the hearts were embossed using embossing powder, one with ultra fine Flower Soft and one with Liquitex liquid ink.
At the top of one of the hearts on each page I added some red glitter parts en a sort of heap. Around the hearts I made a shading with a black carbon pencil.
I stamped tiny hearts all over the page, and on the left page made a few of them dimensional and shiny with a red Viva Pearl pen. With white Liquitex liquid ink I made splatters on the pages and with Black Soot Distress ink I distressed the pages on the edge.
Love the way this spread turned out. Hearts are cool, even in October LOL!! Have a great day, hugs Frea
Challenges:
http://www.sparklingblackrose-craftmylife.blogspot.co.uk/2014/10/all-crafts-challenge-octobernovember.html
http://artisticinspirationschallenges.blogspot.co.uk/2014/10/challenge-113-anything-goes-make-your.html
http://craftingfromtheheartchallengeblog.blogspot.nl/2014/10/challenge-40.html
http://craft-roomchallenge.blogspot.nl/2014/10/make-your-own-background.html
http://partytimetuesdays.blogspot.ca/2014/10/ptt-185-anything-goes-theme.html
http://www.ttcrd.blogspot.nl/2014/10/through-craftroom-doors-challenge.html
http://notjustcardschallenges.blogspot.co.uk/2014/10/challenge-4.html
http://sparklensprinklecreativechallenges.blogspot.nl/2014/10/october-2014-challenge.html
http://thepapernestdollschallenge.blogspot.nl/2014/10/ch-21-guest-designeranything-goes.html
http://dreamvalleychallenges.blogspot.ca/2014/10/challenge-92-anything-but-card.html
http://www.scribbleandscrapcrafts.blogspot.co.uk/2014/10/challenge-29-always-anything-goes-3.html
maandag 29 september 2014
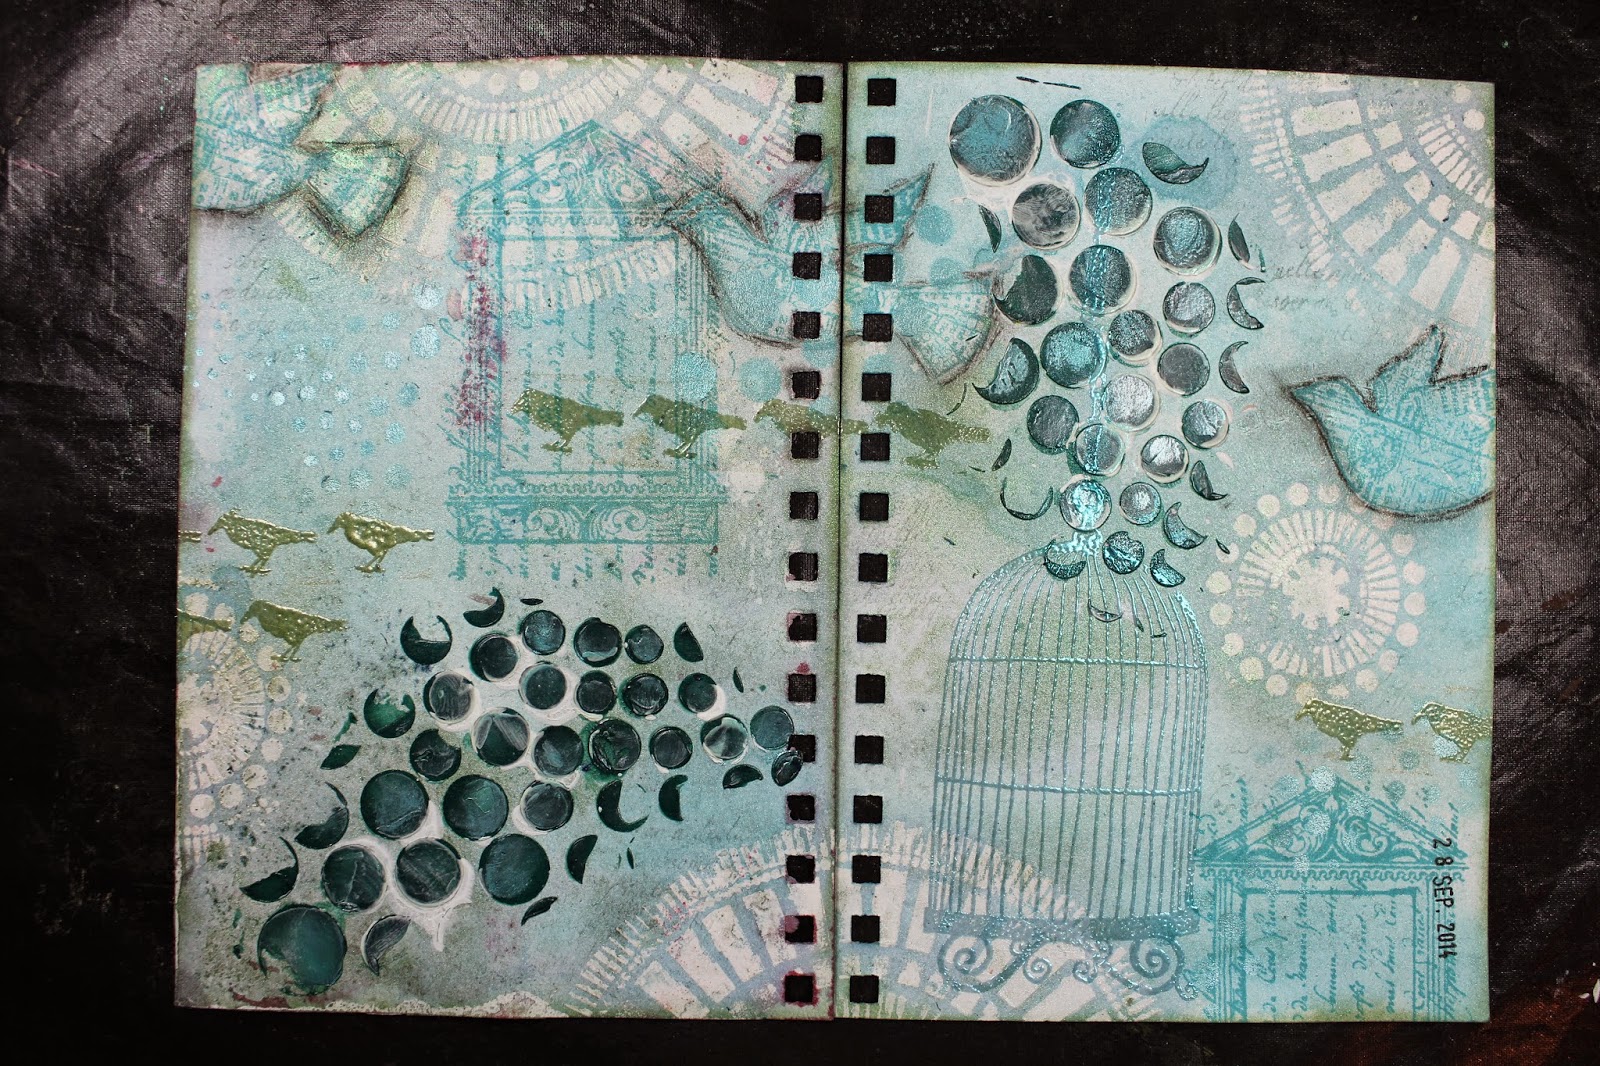
Just a little spread.
I made this spread in my Round Robin album; I had some leftover gel medium and used it through a stencil making the circles. Then I used some home made glimmer sprays to spray the background, the gel medium works as a resist.
Then I stamped the three birds and the shrine like stamps with the script with Ranger Archival ink Aquamarine. I added Charcoal around the birds to give them some depth.
I took out some gel medium and mixed it up with LSG Magicals, Ponderosa Pine Needles ad Bachelor Button Blue and used it through a TCW circle stencil. After drying it, I took some gesso and applied it with my fingers using the same stencil in exactly the same place.
With soft grey ink I stamped some script in the background. Then I used LSG embossing powder Morning Glory Azure to stamp the birdcage and Oakleaf Olive for the small birds. Finally I distressed the edges with Bundled Sage Distress ink.
I hope you enjoyed my little spread and the steps I described to make it. Have a great week, hugs Frea
Challenges:
http://notjustcardschallenges.blogspot.co.uk/2014/09/challenge-03.html
http://craftcreatoins.blogspot.nl/p/new-challenge.html
http://www.craftybloggersnetwork.blogspot.nl/2014/09/september-challenge-at-crafty-bloggers.html
http://craftingfromtheheartchallengeblog.blogspot.nl/2014/09/challenge-38.html
http://squigglefly.blogspot.nl/2014/09/squigglefly-challenge-sfc3914.html
http://stampandcreateblog.blogspot.nl/search/label/Challenge
http://www.flonzcraft.com/vsc/?p=1637
http://craftingattheweekend.blogspot.co.uk/2014/09/challenge-6-and-new-design-team.html
http://brownsugarchallenge.blogspot.nl/2014/09/challenge-113-anything-goes.html
http://www.craftforthecraic.blogspot.ie/2014/09/september-challenge-8-something-with.html
http://blog.docerelashop.com/2014/09/design-team-post-challenge-70-anything.html
Then I stamped the three birds and the shrine like stamps with the script with Ranger Archival ink Aquamarine. I added Charcoal around the birds to give them some depth.
I took out some gel medium and mixed it up with LSG Magicals, Ponderosa Pine Needles ad Bachelor Button Blue and used it through a TCW circle stencil. After drying it, I took some gesso and applied it with my fingers using the same stencil in exactly the same place.
With soft grey ink I stamped some script in the background. Then I used LSG embossing powder Morning Glory Azure to stamp the birdcage and Oakleaf Olive for the small birds. Finally I distressed the edges with Bundled Sage Distress ink.
I hope you enjoyed my little spread and the steps I described to make it. Have a great week, hugs Frea
Challenges:
http://notjustcardschallenges.blogspot.co.uk/2014/09/challenge-03.html
http://craftcreatoins.blogspot.nl/p/new-challenge.html
http://www.craftybloggersnetwork.blogspot.nl/2014/09/september-challenge-at-crafty-bloggers.html
http://craftingfromtheheartchallengeblog.blogspot.nl/2014/09/challenge-38.html
http://squigglefly.blogspot.nl/2014/09/squigglefly-challenge-sfc3914.html
http://stampandcreateblog.blogspot.nl/search/label/Challenge
http://www.flonzcraft.com/vsc/?p=1637
http://craftingattheweekend.blogspot.co.uk/2014/09/challenge-6-and-new-design-team.html
http://brownsugarchallenge.blogspot.nl/2014/09/challenge-113-anything-goes.html
http://www.craftforthecraic.blogspot.ie/2014/09/september-challenge-8-something-with.html
http://blog.docerelashop.com/2014/09/design-team-post-challenge-70-anything.html
zondag 14 september 2014
Youer than you.....
This spread I made in my small Dylusions Journal. The background was made with Grey Dylusions and LSG spray Cotton Candy Pink and Rambling Rose Pink.
I stamped a Dylusions girl and coloured her up with Copics. I added Stickles to the dots on her dress and Glossy accents on her boots. I used some striped washi tape here and there.
I used a stencil for the little grey squares with acrylic paint and did some white drippage with gesso. The cirles were made with bottle tops and gesso and the strips with an old gift card. I stamped with embossing ink and Ranger Cement embossing powder.
Around the edges I doodles some and I wrote the text with a white sharpie edging it with an Identipen in black. The quote is by Dr. Seuss.
Hope you like my spread, I enjoyed making it. Ha ve a great week. Hugs Frea
Challenges:
http://avenue613.blogspot.nl/2014/09/challenge-89-anything-goes.html
http://www.scribbleandscrapcrafts.blogspot.co.uk/2014/09/challenge-27-anything-goes-and-candy.html
http://suzypantssmarty.blogspot.co.uk/2014/09/suzy-bees-bloomin-challenge-46.html
http://treasuredtimesrubberstampschallenges.blogspot.nl/2014/09/challenge-24.html
I stamped a Dylusions girl and coloured her up with Copics. I added Stickles to the dots on her dress and Glossy accents on her boots. I used some striped washi tape here and there.
I used a stencil for the little grey squares with acrylic paint and did some white drippage with gesso. The cirles were made with bottle tops and gesso and the strips with an old gift card. I stamped with embossing ink and Ranger Cement embossing powder.
Around the edges I doodles some and I wrote the text with a white sharpie edging it with an Identipen in black. The quote is by Dr. Seuss.
Hope you like my spread, I enjoyed making it. Ha ve a great week. Hugs Frea
Challenges:
http://avenue613.blogspot.nl/2014/09/challenge-89-anything-goes.html
http://www.scribbleandscrapcrafts.blogspot.co.uk/2014/09/challenge-27-anything-goes-and-candy.html
http://suzypantssmarty.blogspot.co.uk/2014/09/suzy-bees-bloomin-challenge-46.html
http://treasuredtimesrubberstampschallenges.blogspot.nl/2014/09/challenge-24.html
woensdag 10 september 2014
Mij Round Robin Art Journal torn apart.....
Hi girls, hope you are all doing well. Yesterday I had a play at my friend Astrid's house and I decided to take apart my Round Robin journal which I received back a couple of weeks ago. Itwas so thick the ring that bound it couldn't really take it, and there are quite some spreads to go until it is full. Since I own a Bind it All, I can put a larger spiral in, and on top of that it makes it easier to work on the loose pages. So I made my first spread yesterday. The background I made with some soft green en blue acrylic paints.
I used my brandnew TCW stencil to make the grungy shapes using a sponge and an armygreen acrylic paint. I then took out some modeling paste and made the butterflies with the same stencil.
I used my (also brandnew) LSG embossingpowder Oakleaf Olive to stamp this large dragonfly and the Field Notes which are stamps by Tattered Angels.
In de background I stamped some tiny script with a Prima stamp and Archival Cornflower Blue. I used a babywipe and the same ink to take the bright white off the butterflies, and distress the edges of the papers.
Unfortunately the colours don't really appear on the photos the way they are in real life, and the gorgeous shimmer of the embossingpowder doesn't show up either, but it will have to do.
I hope you have a great week, and see you in the weekend.
Hugs Frea
Challenges:
http://citycrafter.blogspot.nl/2014/09/city-crafter-challenge-blog-week-228.html
http://2cuteinkchallenges.blogspot.nl/2014/09/challenge-114.html
http://www.sparklingblackrose-craftmylife.blogspot.co.uk/2014/08/all-crafts-challenge-augustseptember.html
http://craftingfromtheheartchallengeblog.blogspot.nl/2014/09/challenge-35.html
http://ttcrd.blogspot.nl/2014/09/ttcrd-challenge-september-9-september-15.html
http://notjustcardschallenges.blogspot.co.uk/2014/09/challenge-01.html
http://paulaholifieldcrafts.blogspot.co.uk/2014/09/albc-distress-it.html
http://alteredeclectics.blogspot.co.uk/2014/09/september-challenge-time.html
http://bastel-traum.blogspot.nl/2014/08/challenge-tiermotive.html
http://kreativeinkauf-challenge.blogspot.de/2014/08/18-augustseptember.html
http://ladybugcrafts.blogspot.nl/2014/09/september-challenge-july-winner.html
I used my brandnew TCW stencil to make the grungy shapes using a sponge and an armygreen acrylic paint. I then took out some modeling paste and made the butterflies with the same stencil.
I used my (also brandnew) LSG embossingpowder Oakleaf Olive to stamp this large dragonfly and the Field Notes which are stamps by Tattered Angels.
In de background I stamped some tiny script with a Prima stamp and Archival Cornflower Blue. I used a babywipe and the same ink to take the bright white off the butterflies, and distress the edges of the papers.
Unfortunately the colours don't really appear on the photos the way they are in real life, and the gorgeous shimmer of the embossingpowder doesn't show up either, but it will have to do.
I hope you have a great week, and see you in the weekend.
Hugs Frea
Challenges:
http://citycrafter.blogspot.nl/2014/09/city-crafter-challenge-blog-week-228.html
http://2cuteinkchallenges.blogspot.nl/2014/09/challenge-114.html
http://www.sparklingblackrose-craftmylife.blogspot.co.uk/2014/08/all-crafts-challenge-augustseptember.html
http://craftingfromtheheartchallengeblog.blogspot.nl/2014/09/challenge-35.html
http://ttcrd.blogspot.nl/2014/09/ttcrd-challenge-september-9-september-15.html
http://notjustcardschallenges.blogspot.co.uk/2014/09/challenge-01.html
http://paulaholifieldcrafts.blogspot.co.uk/2014/09/albc-distress-it.html
http://alteredeclectics.blogspot.co.uk/2014/09/september-challenge-time.html
http://bastel-traum.blogspot.nl/2014/08/challenge-tiermotive.html
http://kreativeinkauf-challenge.blogspot.de/2014/08/18-augustseptember.html
http://ladybugcrafts.blogspot.nl/2014/09/september-challenge-july-winner.html
zondag 13 april 2014
You make my heart sing.
Again I am hiding in my craftroom this weekend from the pollen outside. I'm getting so fed up with this. I was supposed to go to a concert today with hubby and some friends, but no such luck. It's just not doable for me to go outside right now, grrrrr!
So what to do then?? Simple questions have simple answers; crafting!! Here's what I made. I started my spread with applying fiber paste to my pages. Now that takes overnight to dry. Then I coated the entire spread with black gesso.
In order to make the fibers stand out and show, I used my brandnew turqoise Inca Gold which I applied using my fingers. The cheap chipboard letter were of an entirely wrong colour, but I have just bought some sets of embossing powders and one set was exactly right. Now the colour matches perfectly.
Each set has a semi matte and a glitter colour. And here you see the glitter one, used with a heart stamp on turqoise cardstock. After stamping and embossing I cut the heart out and added 3D tape underneath to slightly raise it. I took some baker's twine and glued that down with glossy accents and made an additional bow that I added to the heart with a hot glue gun. The idea was to make it look like a balloon.
Because the background was a little black black (if you know what I mean) I stamped a little background stamp on with white Stazon; it's quite subtly, but I like it. Finished the page off with some doodling around the spread with a white sharpie, and that was it.
Have a great Sunday you all, hugs Frea
http://sparklensprinklecreativechallenges.blogspot.nl/2014/04/april-2014-challenge.html
http://scrapping4funchallenges.blogspot.ca/2014/04/challenge-14-anything-goes.html
http://4kraftygirlzchallenges.blogspot.co.uk/2014/04/challenge-15_3.html
http://alteredeclectics.blogspot.co.uk/2014/04/pinch-punch-fist-day-of-month-lol.html
http://justbcreativecrazy.blogspot.nl/2014/04/aprils-just-because-linky-party.html
http://www.onecrazystampercom.blogspot.ca/2014/04/april-anything-goes-challenge.html
http://craftingbydesigns.blogspot.nl/2014/04/april-anything-goes-challenge.html
http://rheddscreativespirit.blogspot.co.uk/2014/04/april-challenge.html
So what to do then?? Simple questions have simple answers; crafting!! Here's what I made. I started my spread with applying fiber paste to my pages. Now that takes overnight to dry. Then I coated the entire spread with black gesso.
In order to make the fibers stand out and show, I used my brandnew turqoise Inca Gold which I applied using my fingers. The cheap chipboard letter were of an entirely wrong colour, but I have just bought some sets of embossing powders and one set was exactly right. Now the colour matches perfectly.
Each set has a semi matte and a glitter colour. And here you see the glitter one, used with a heart stamp on turqoise cardstock. After stamping and embossing I cut the heart out and added 3D tape underneath to slightly raise it. I took some baker's twine and glued that down with glossy accents and made an additional bow that I added to the heart with a hot glue gun. The idea was to make it look like a balloon.
Because the background was a little black black (if you know what I mean) I stamped a little background stamp on with white Stazon; it's quite subtly, but I like it. Finished the page off with some doodling around the spread with a white sharpie, and that was it.
Have a great Sunday you all, hugs Frea
http://sparklensprinklecreativechallenges.blogspot.nl/2014/04/april-2014-challenge.html
http://scrapping4funchallenges.blogspot.ca/2014/04/challenge-14-anything-goes.html
http://4kraftygirlzchallenges.blogspot.co.uk/2014/04/challenge-15_3.html
http://alteredeclectics.blogspot.co.uk/2014/04/pinch-punch-fist-day-of-month-lol.html
http://justbcreativecrazy.blogspot.nl/2014/04/aprils-just-because-linky-party.html
http://www.onecrazystampercom.blogspot.ca/2014/04/april-anything-goes-challenge.html
http://craftingbydesigns.blogspot.nl/2014/04/april-anything-goes-challenge.html
http://rheddscreativespirit.blogspot.co.uk/2014/04/april-challenge.html
Abonneren op:
Posts (Atom)